Project Overview
Forstadsmuseet (the Suburb Museum) in Hvidovre, Denmark is not a regular museum—it's a museum without a place and without artifacts. This can be hard for people to understand, so they needed to create a space for people to understand what the museum is about, which would inspire them to go out and experience it where it is supposed to be experienced—the nature and the streets of the suburbs. An opportunity to do this presented it self to them as they got hold of a building called Hovedporten (Main gate) which gave the project its name: Historieporten (Story gate/History gate).
My Contributions
As I joined Forstadsmuseet for a short project position as an exhibition designer I had the main responsibility of conceptualizing the design for Historieporten along with the in.house technician. Specifically, I facilitated various workshops, body stormed, sketched, 3D modeled, user tested, etc.
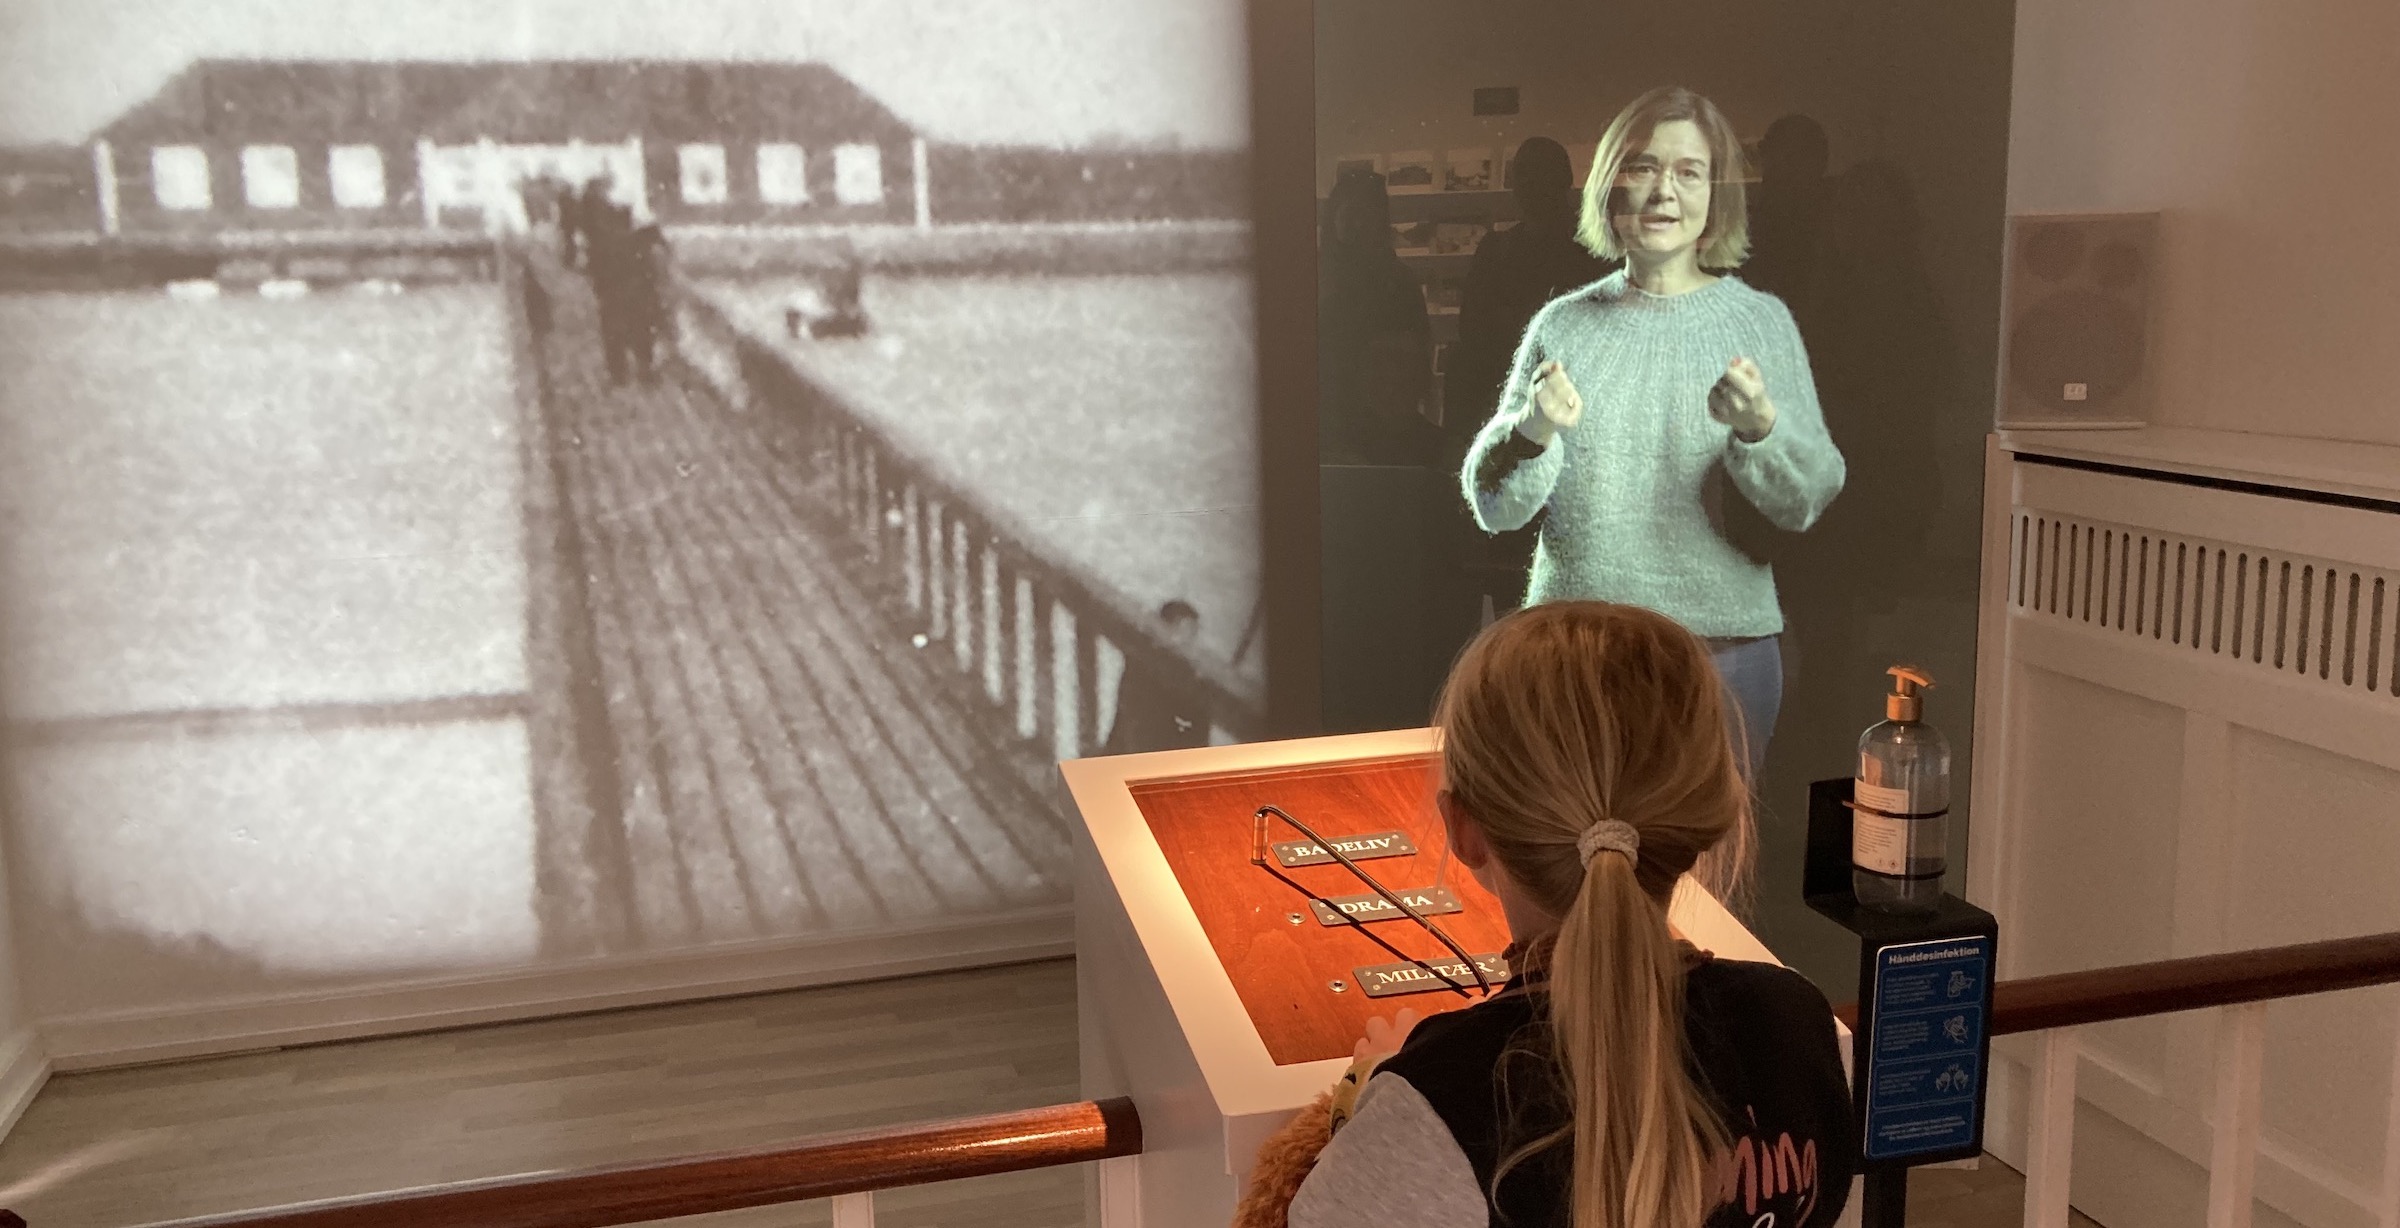
Photo from the exhibition opening
Process
Below you will find a step by step overview of the 3-week project.
Vision
In preparation for the kick-off meeting I read the vision statement and created a persona template to be filled out at the meeting.
The vision Historieporten is to make accessible and connect local history and identity building and to create a physical entrance for the next generation af "History in the street", which is the core of Forstadsmusset.
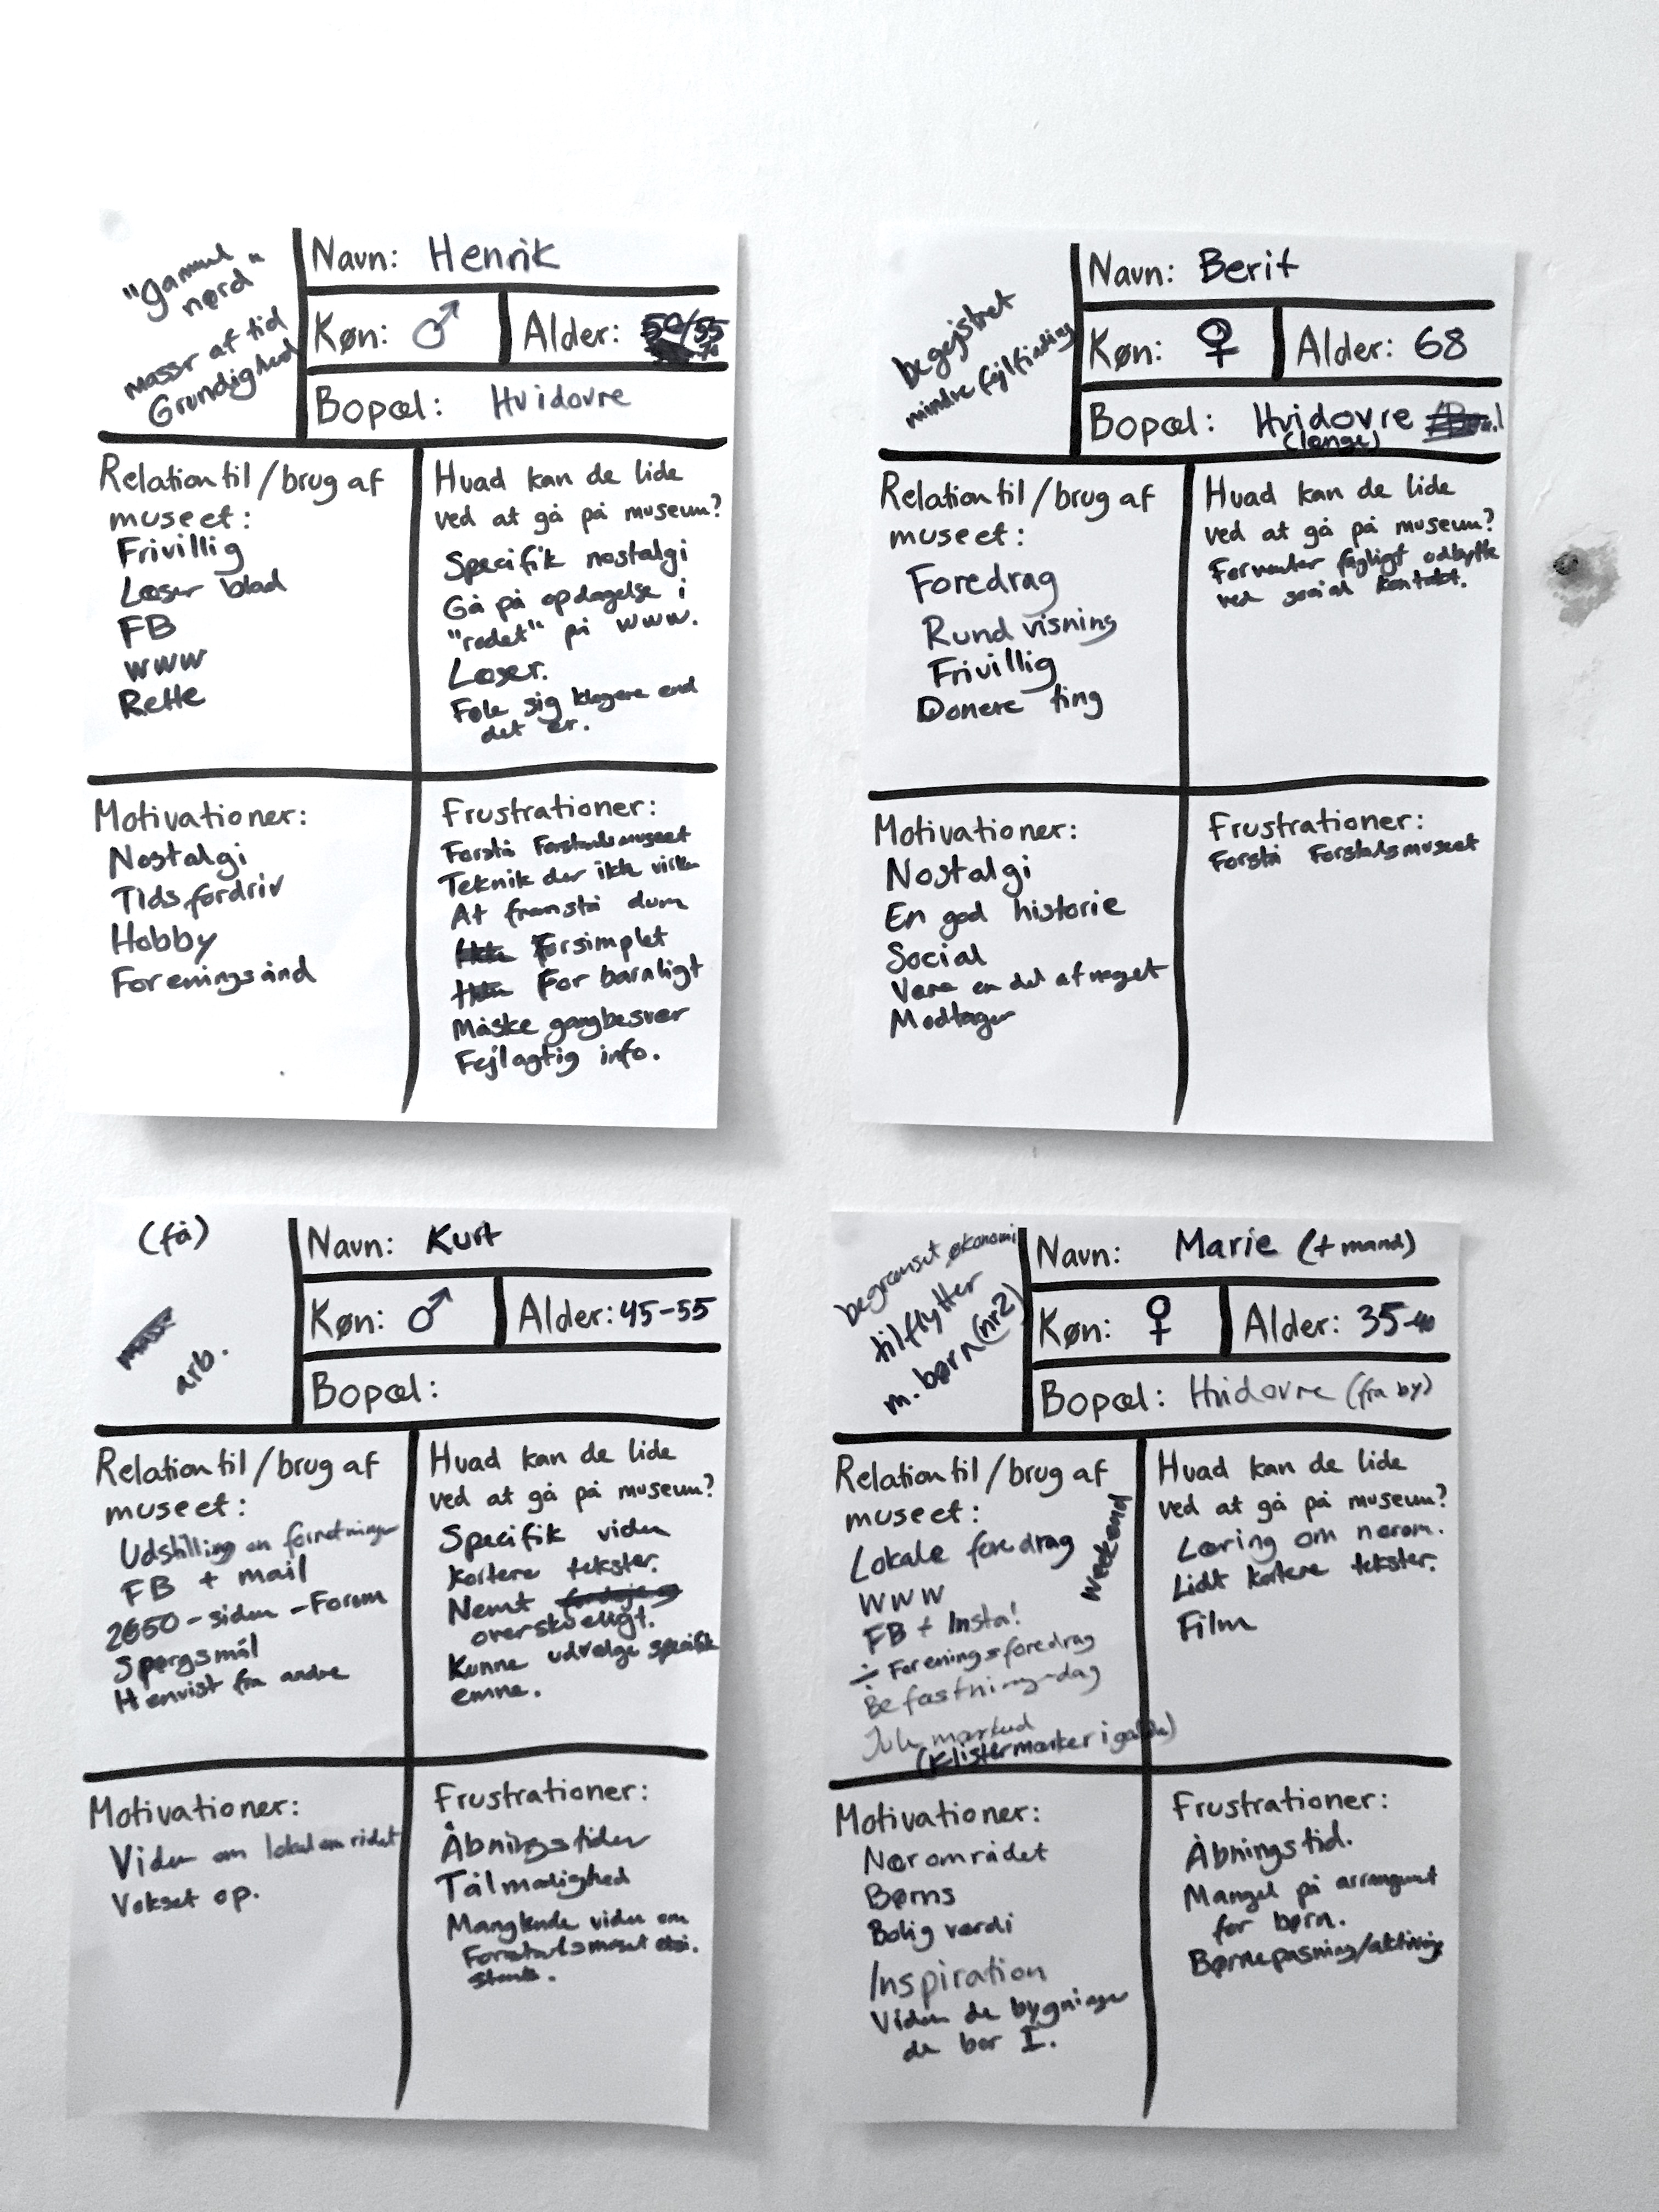
Personas
In order to keep the users (visitors) in mind through the entire process I started the meeting by making personas in collaboration with the employees at the museum. Four personas were created to personify the typical user groups engaged with the museum at the moment and those who might attend the museum as soon as there is a physical exhibition space. These personas were referred to throughout the rest of the meeting and project with phrases like "Berit wouldn't like that."
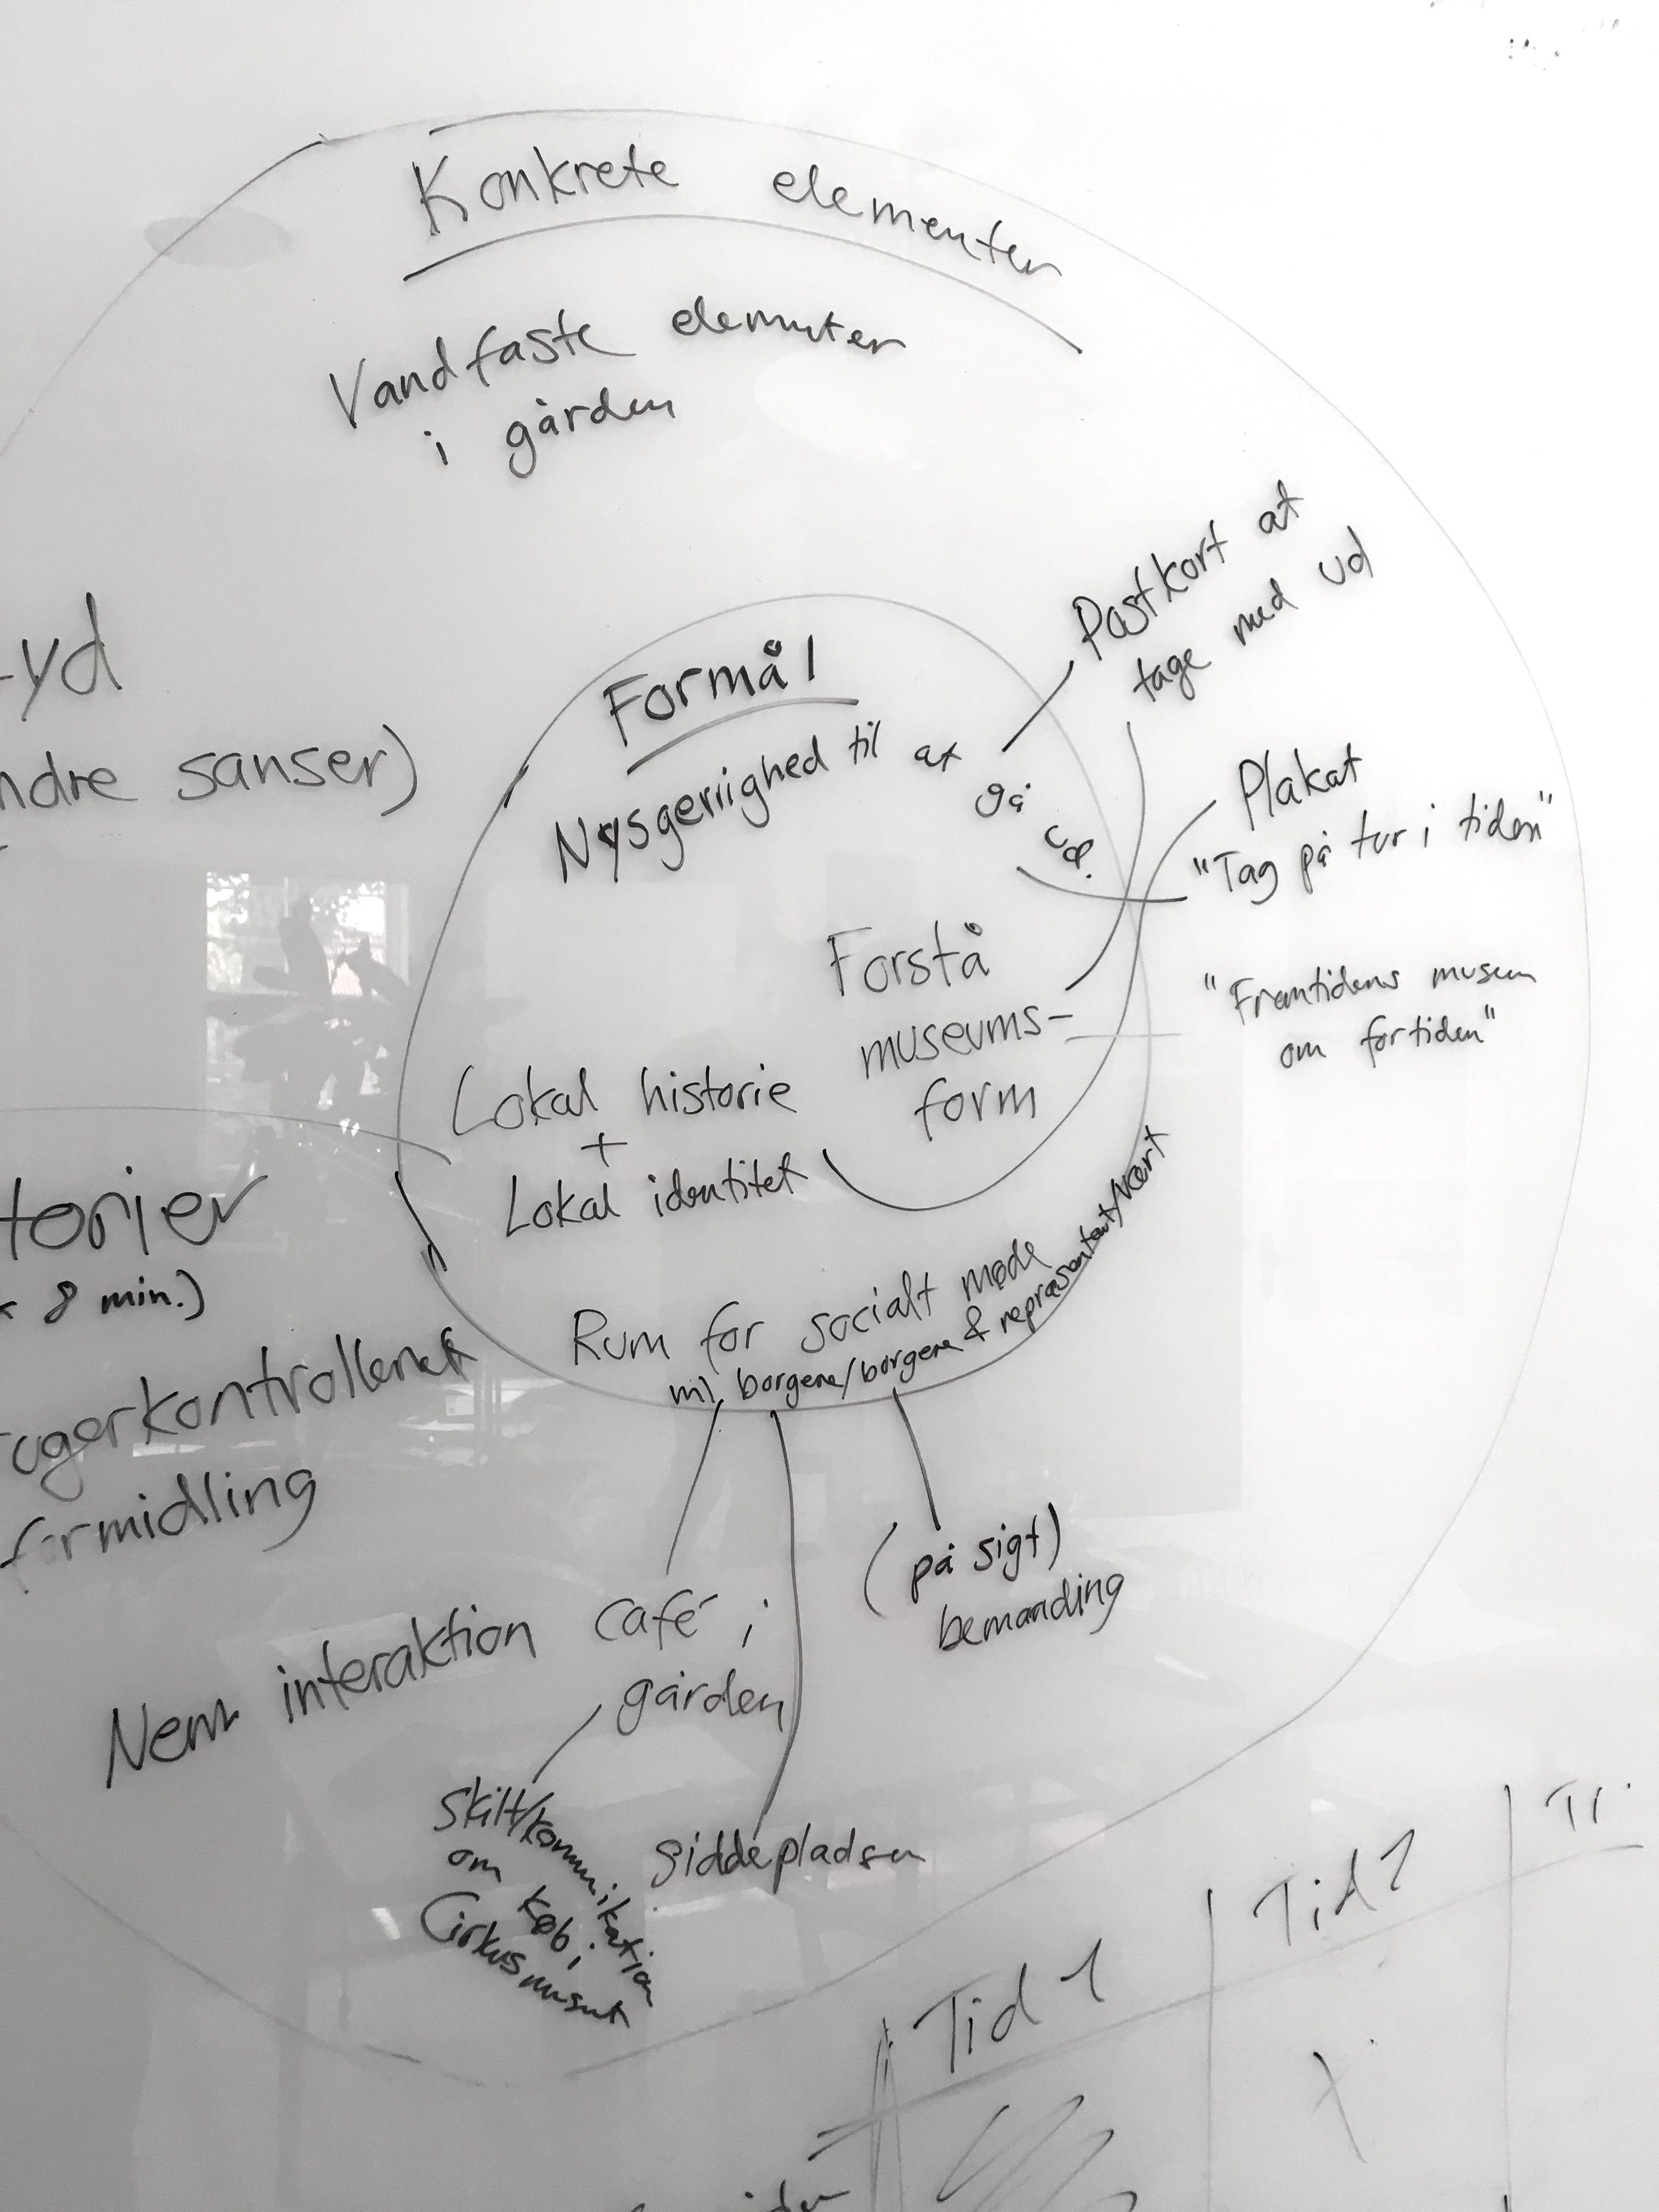
Purpose and concrete elements
After creating personas we moved on to discussing the purpose of Historieporten with reference to the vision statement and further discussios on form and purpose.
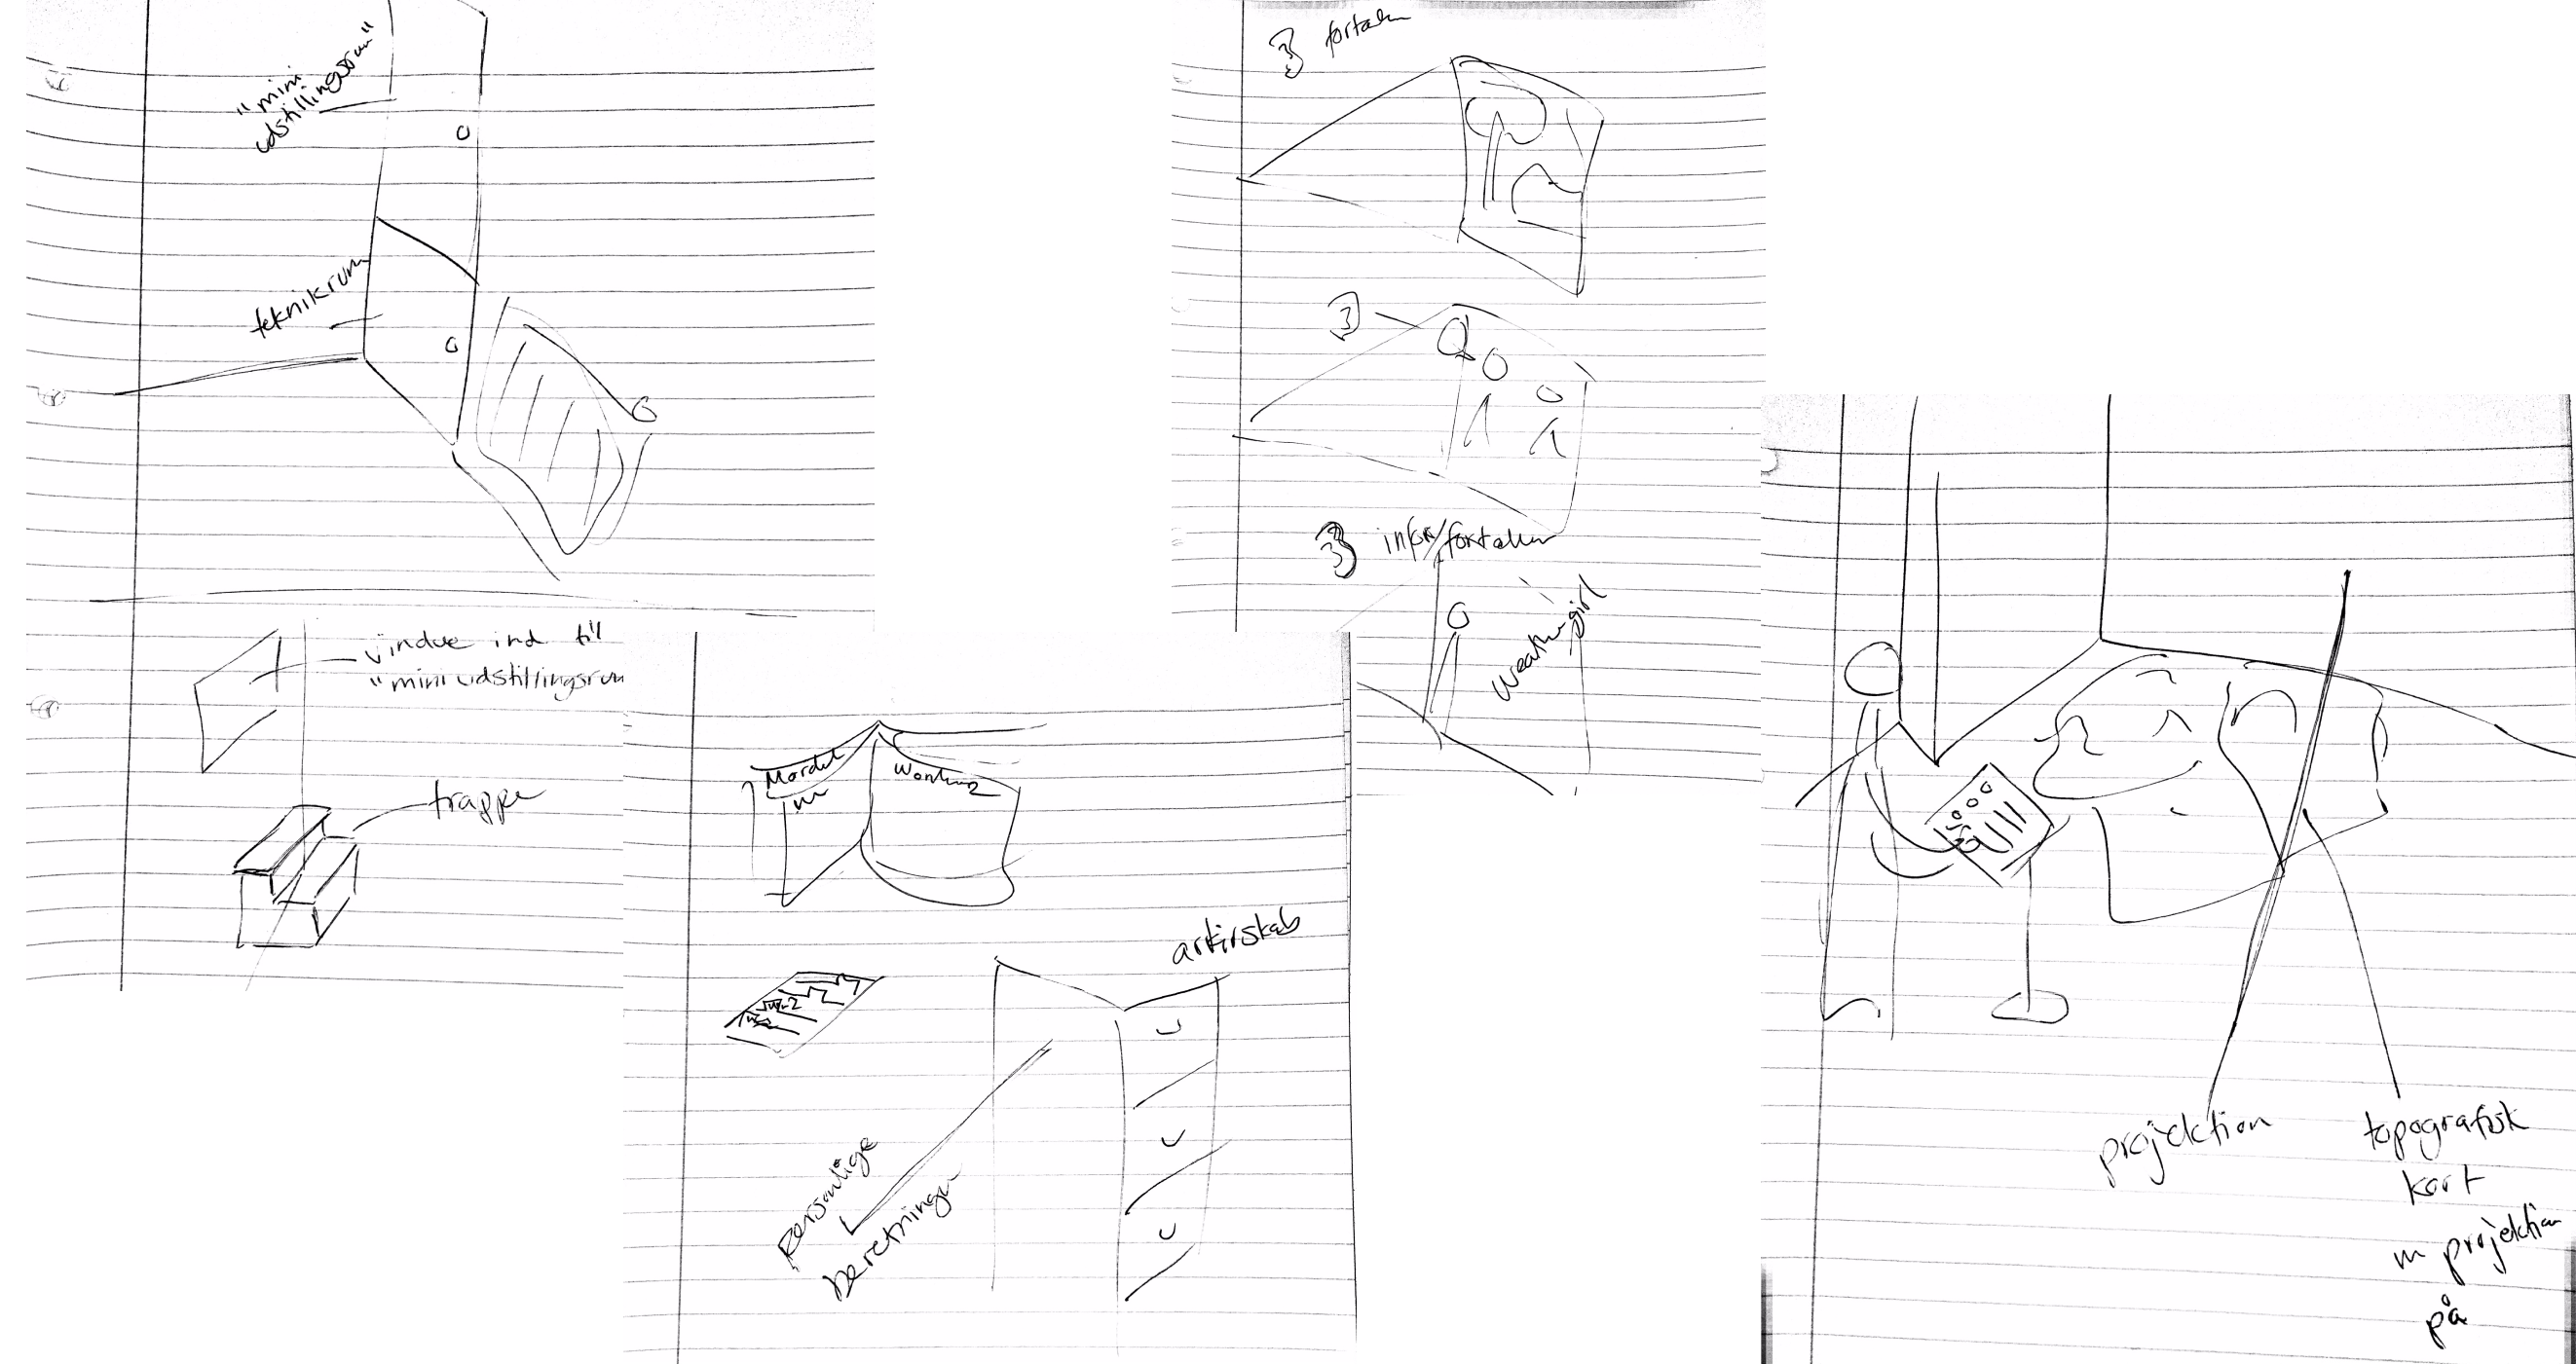
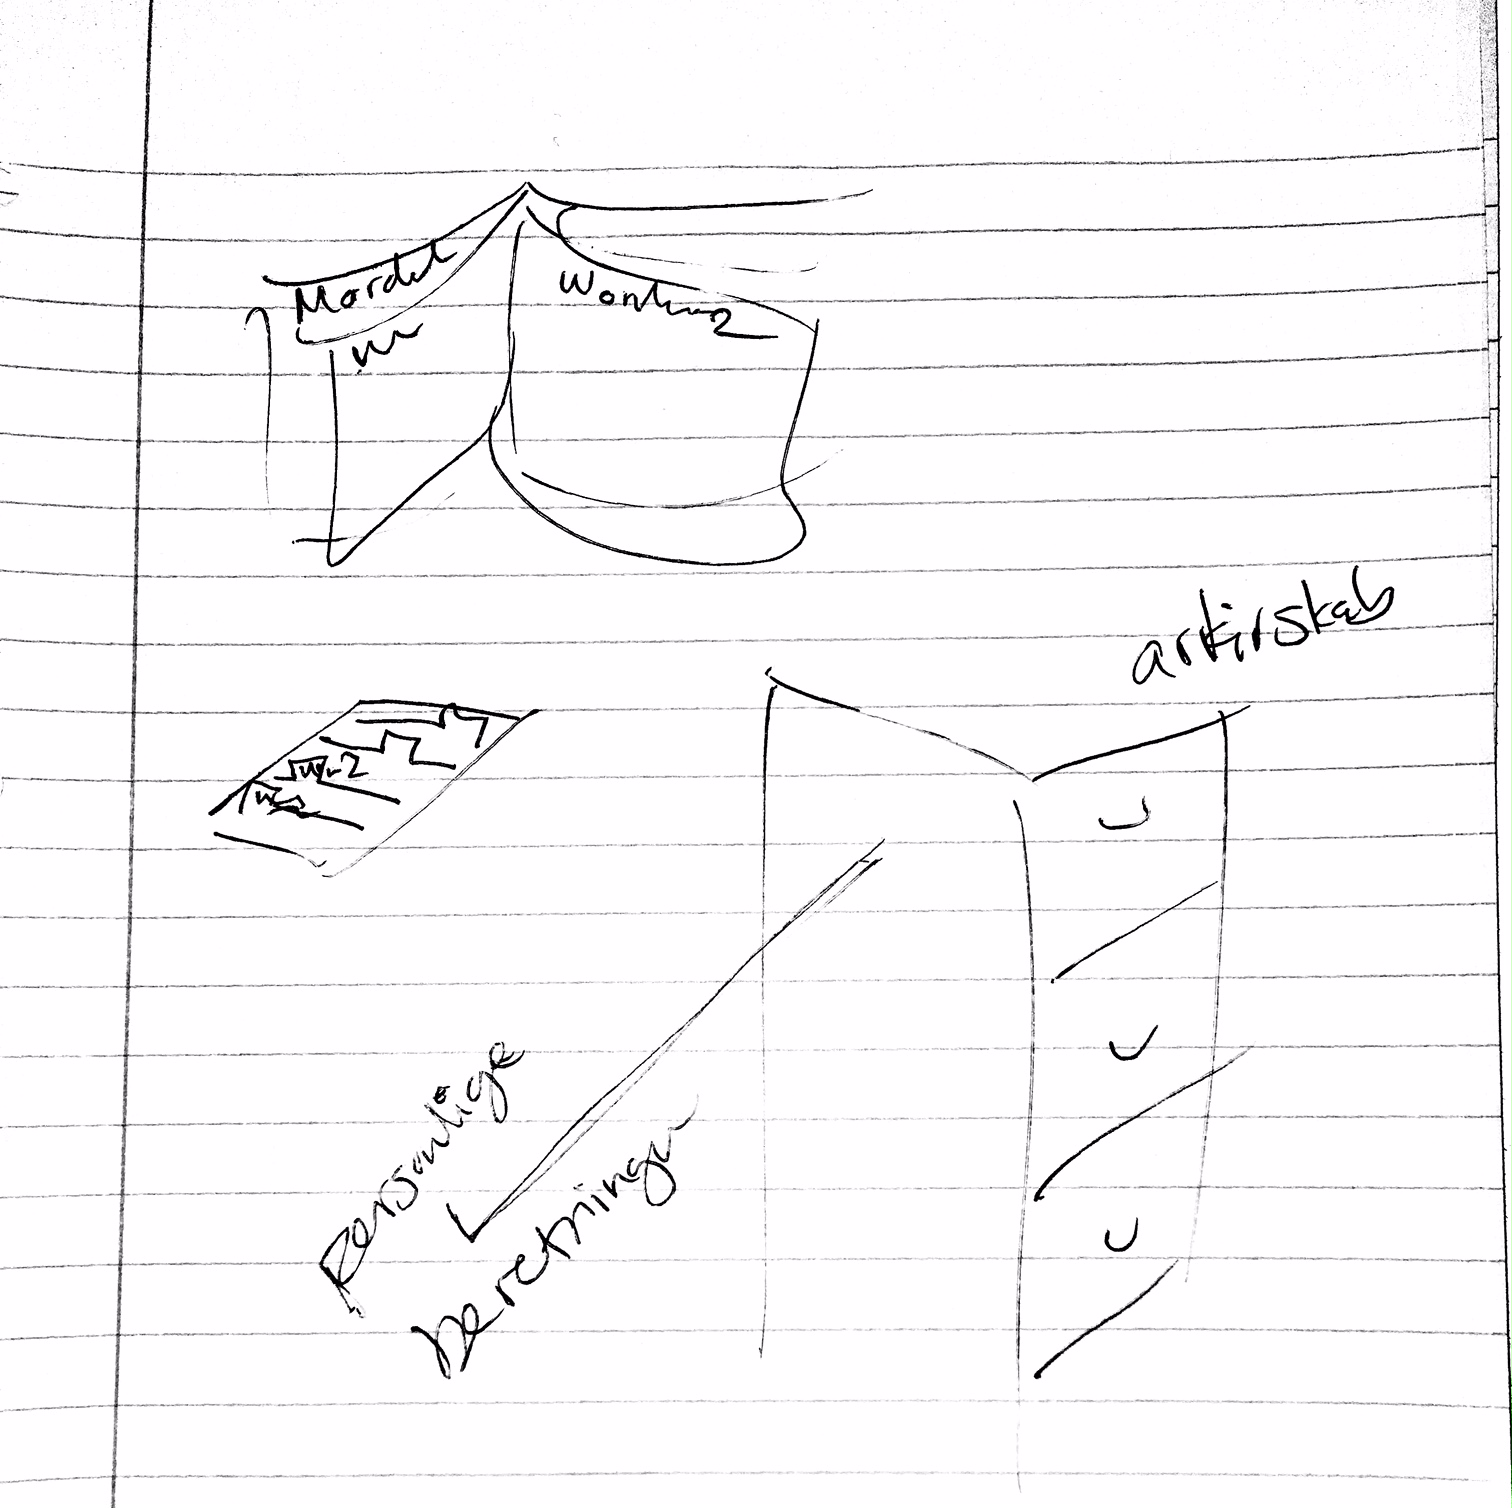
Bodystorming & sketching
After the meeting I went over to the exhibition building with the technician and a cultural communicator to bodystorm and sketch of specific ideas based on the some of the ideas generated at the meeting. A lot of concrete ideas came from this and I sketched out a few of these.
Sketches from the body storming.
Part of the moodboard for Historieporten.
What do we need to test?
Even though ideas were created for the entire building, the team agreed that the most important thing to focus on was the main room and the experience it was supposed to give and the understanding it was supposed to give to the visitors in regards to what kind of museum Forstadsmuseet is. This room needed to be prototyped in low fidelity—just enough to communicate to the other employees what kind of experience the exhibition would be and to be able to discuss internally.
Additionally, the interactive artifacts enabling the visitors to change between different video-experiences needed to be tested with people.
Brainstorming on different types of interactions
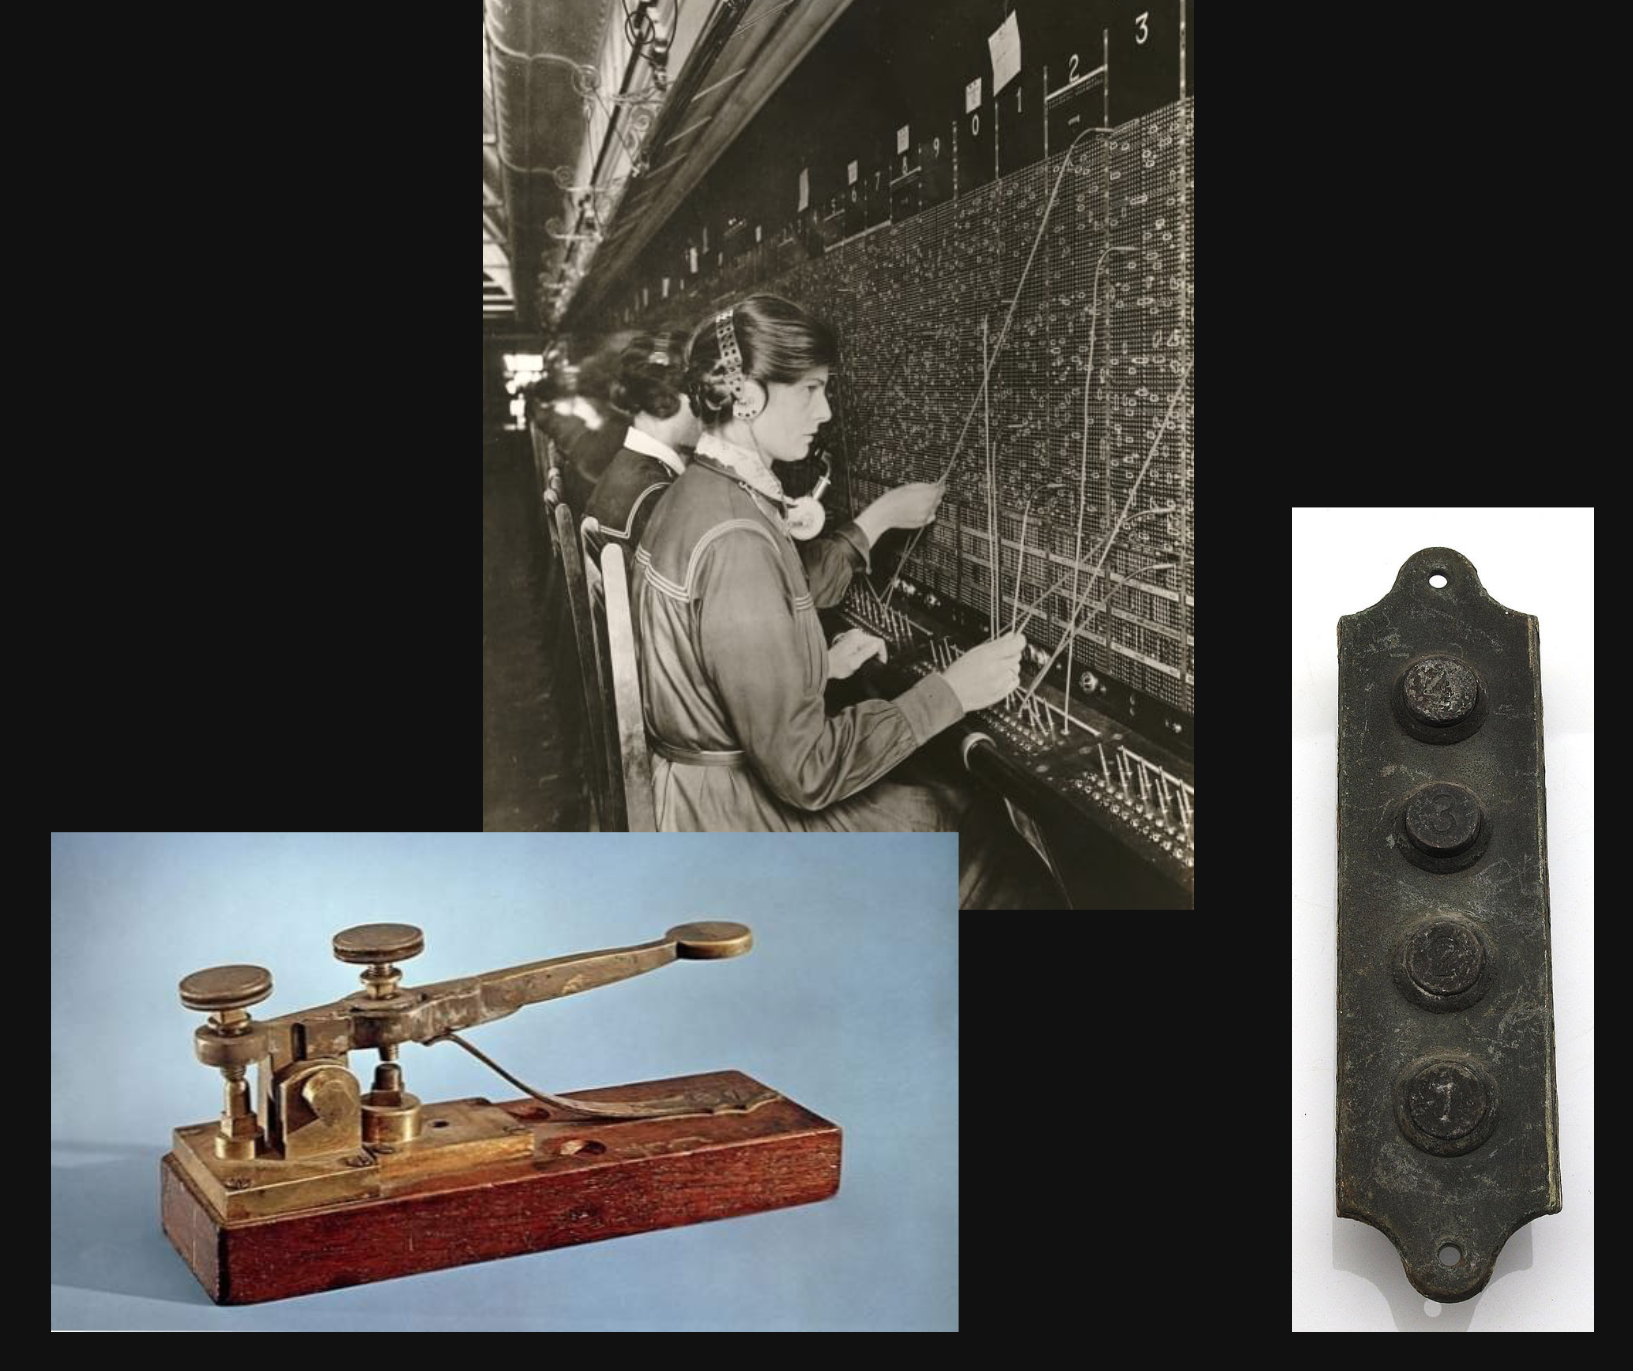
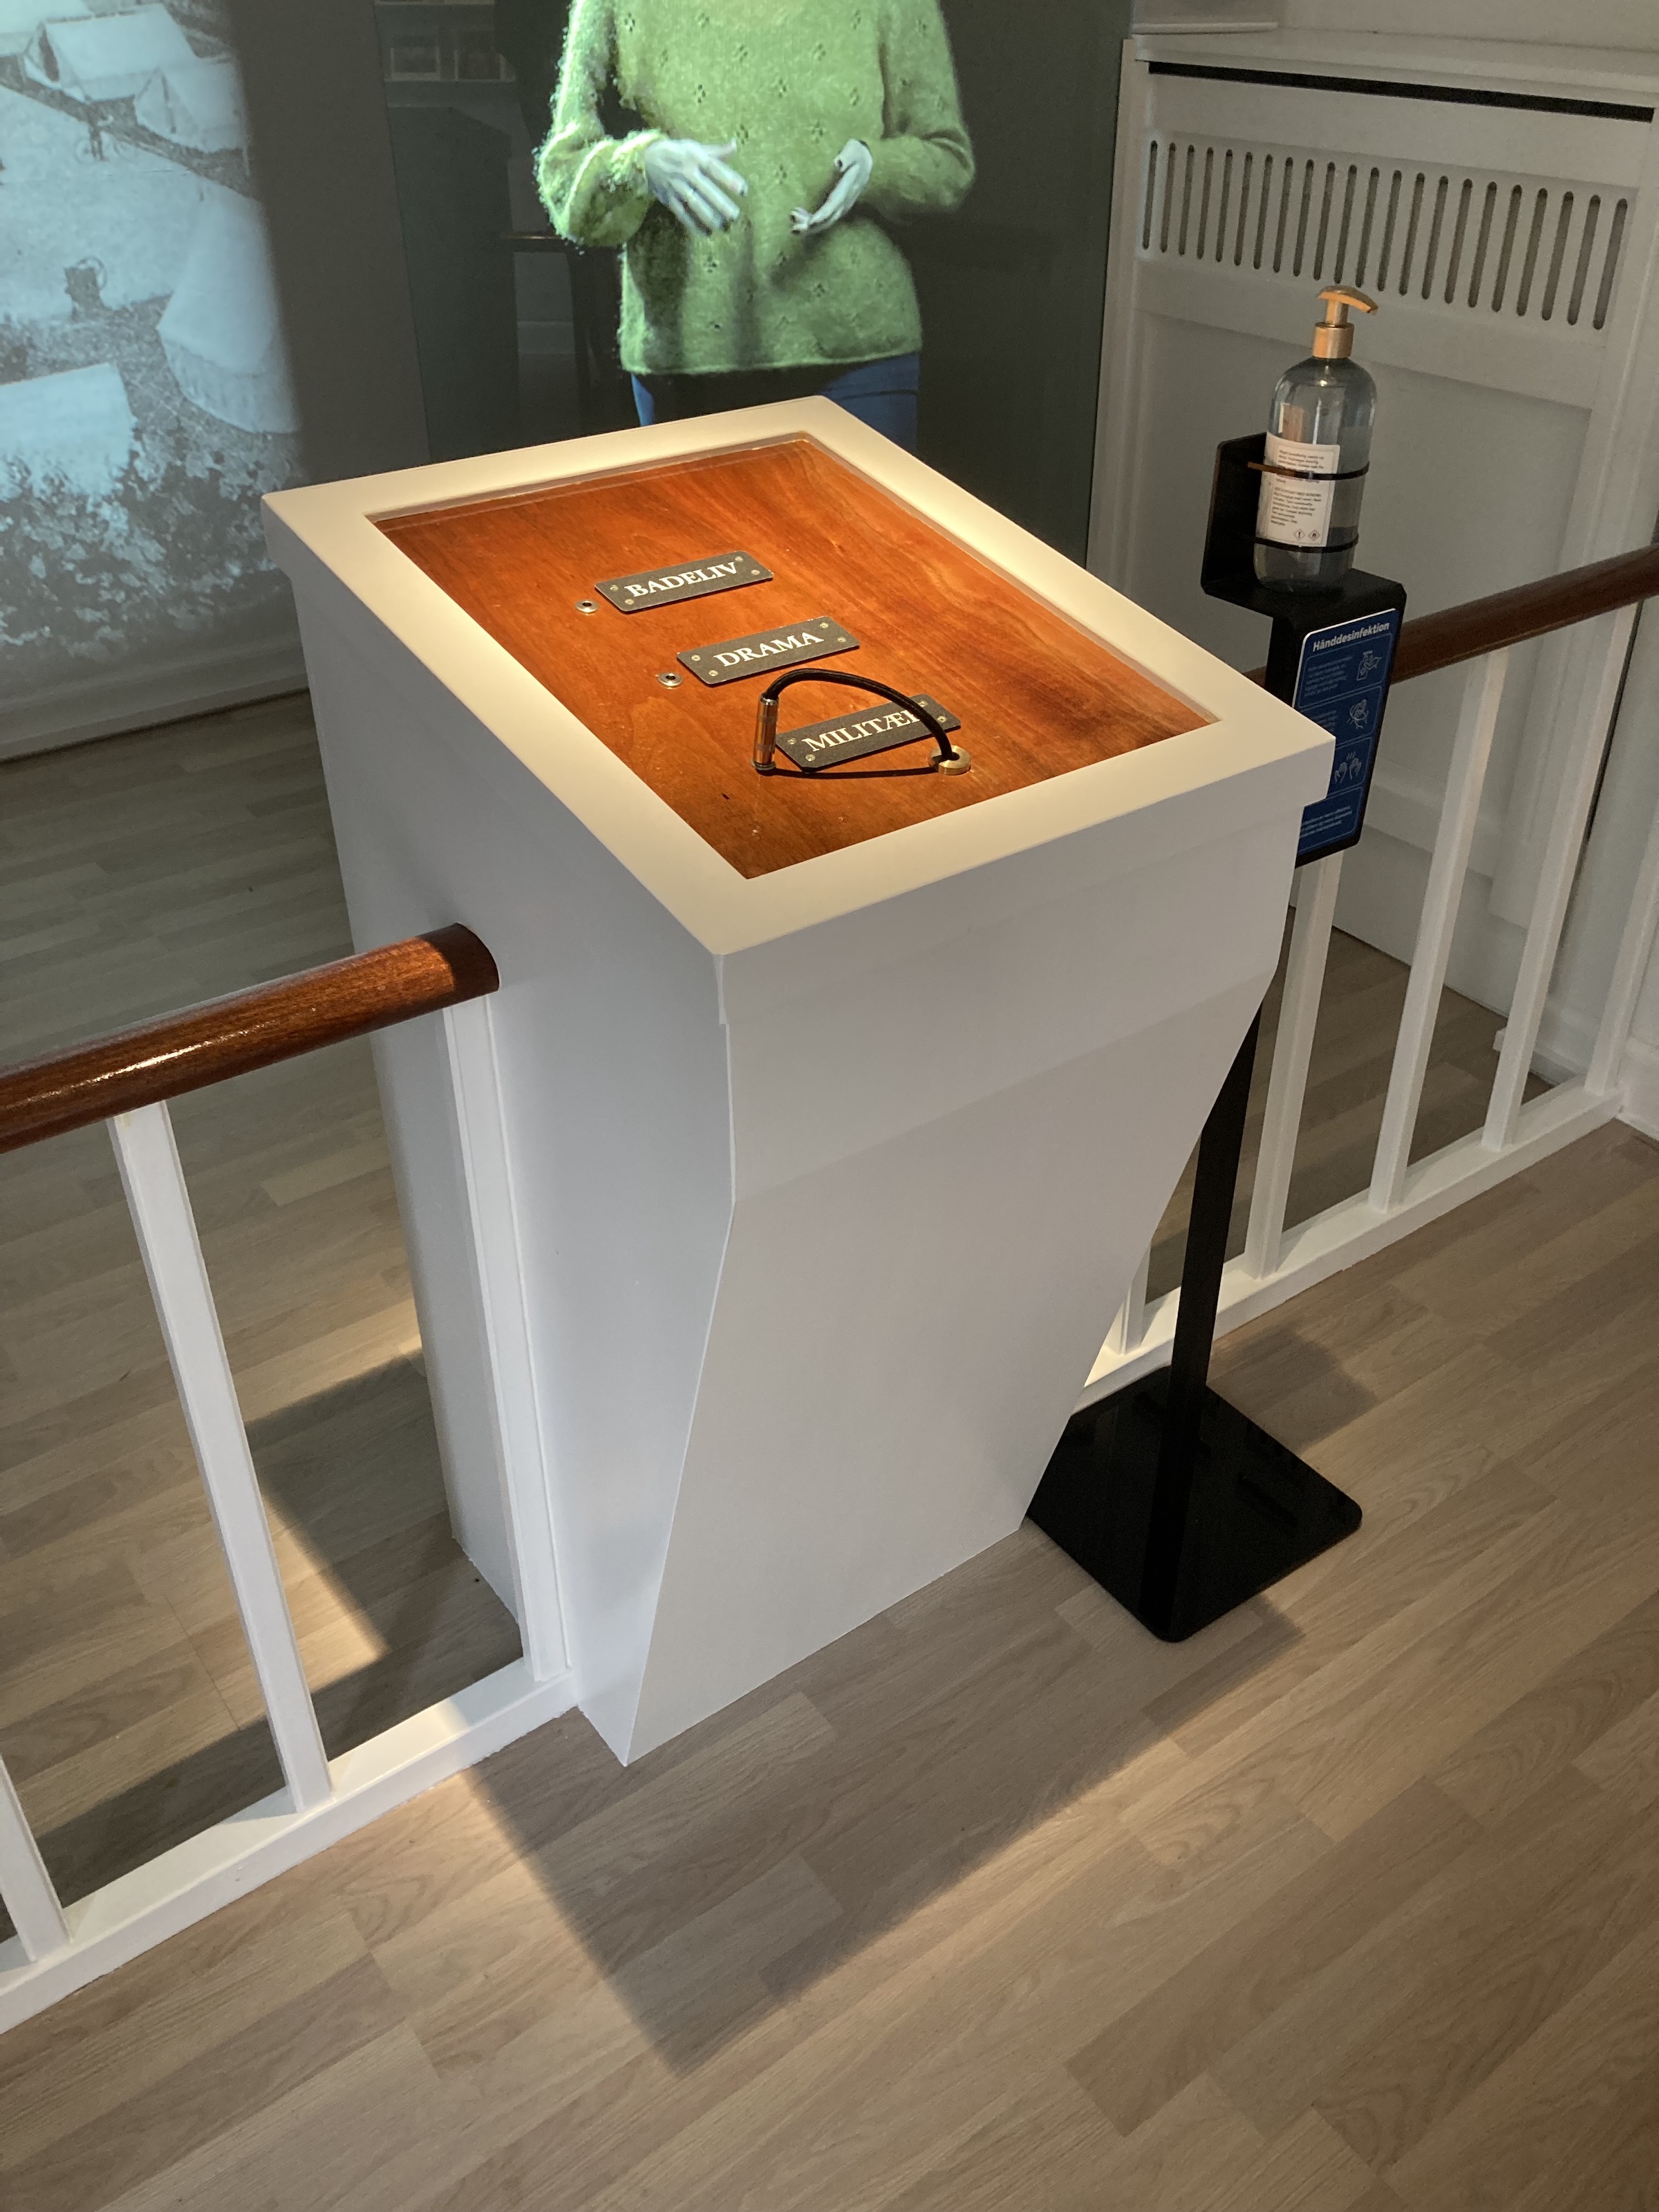
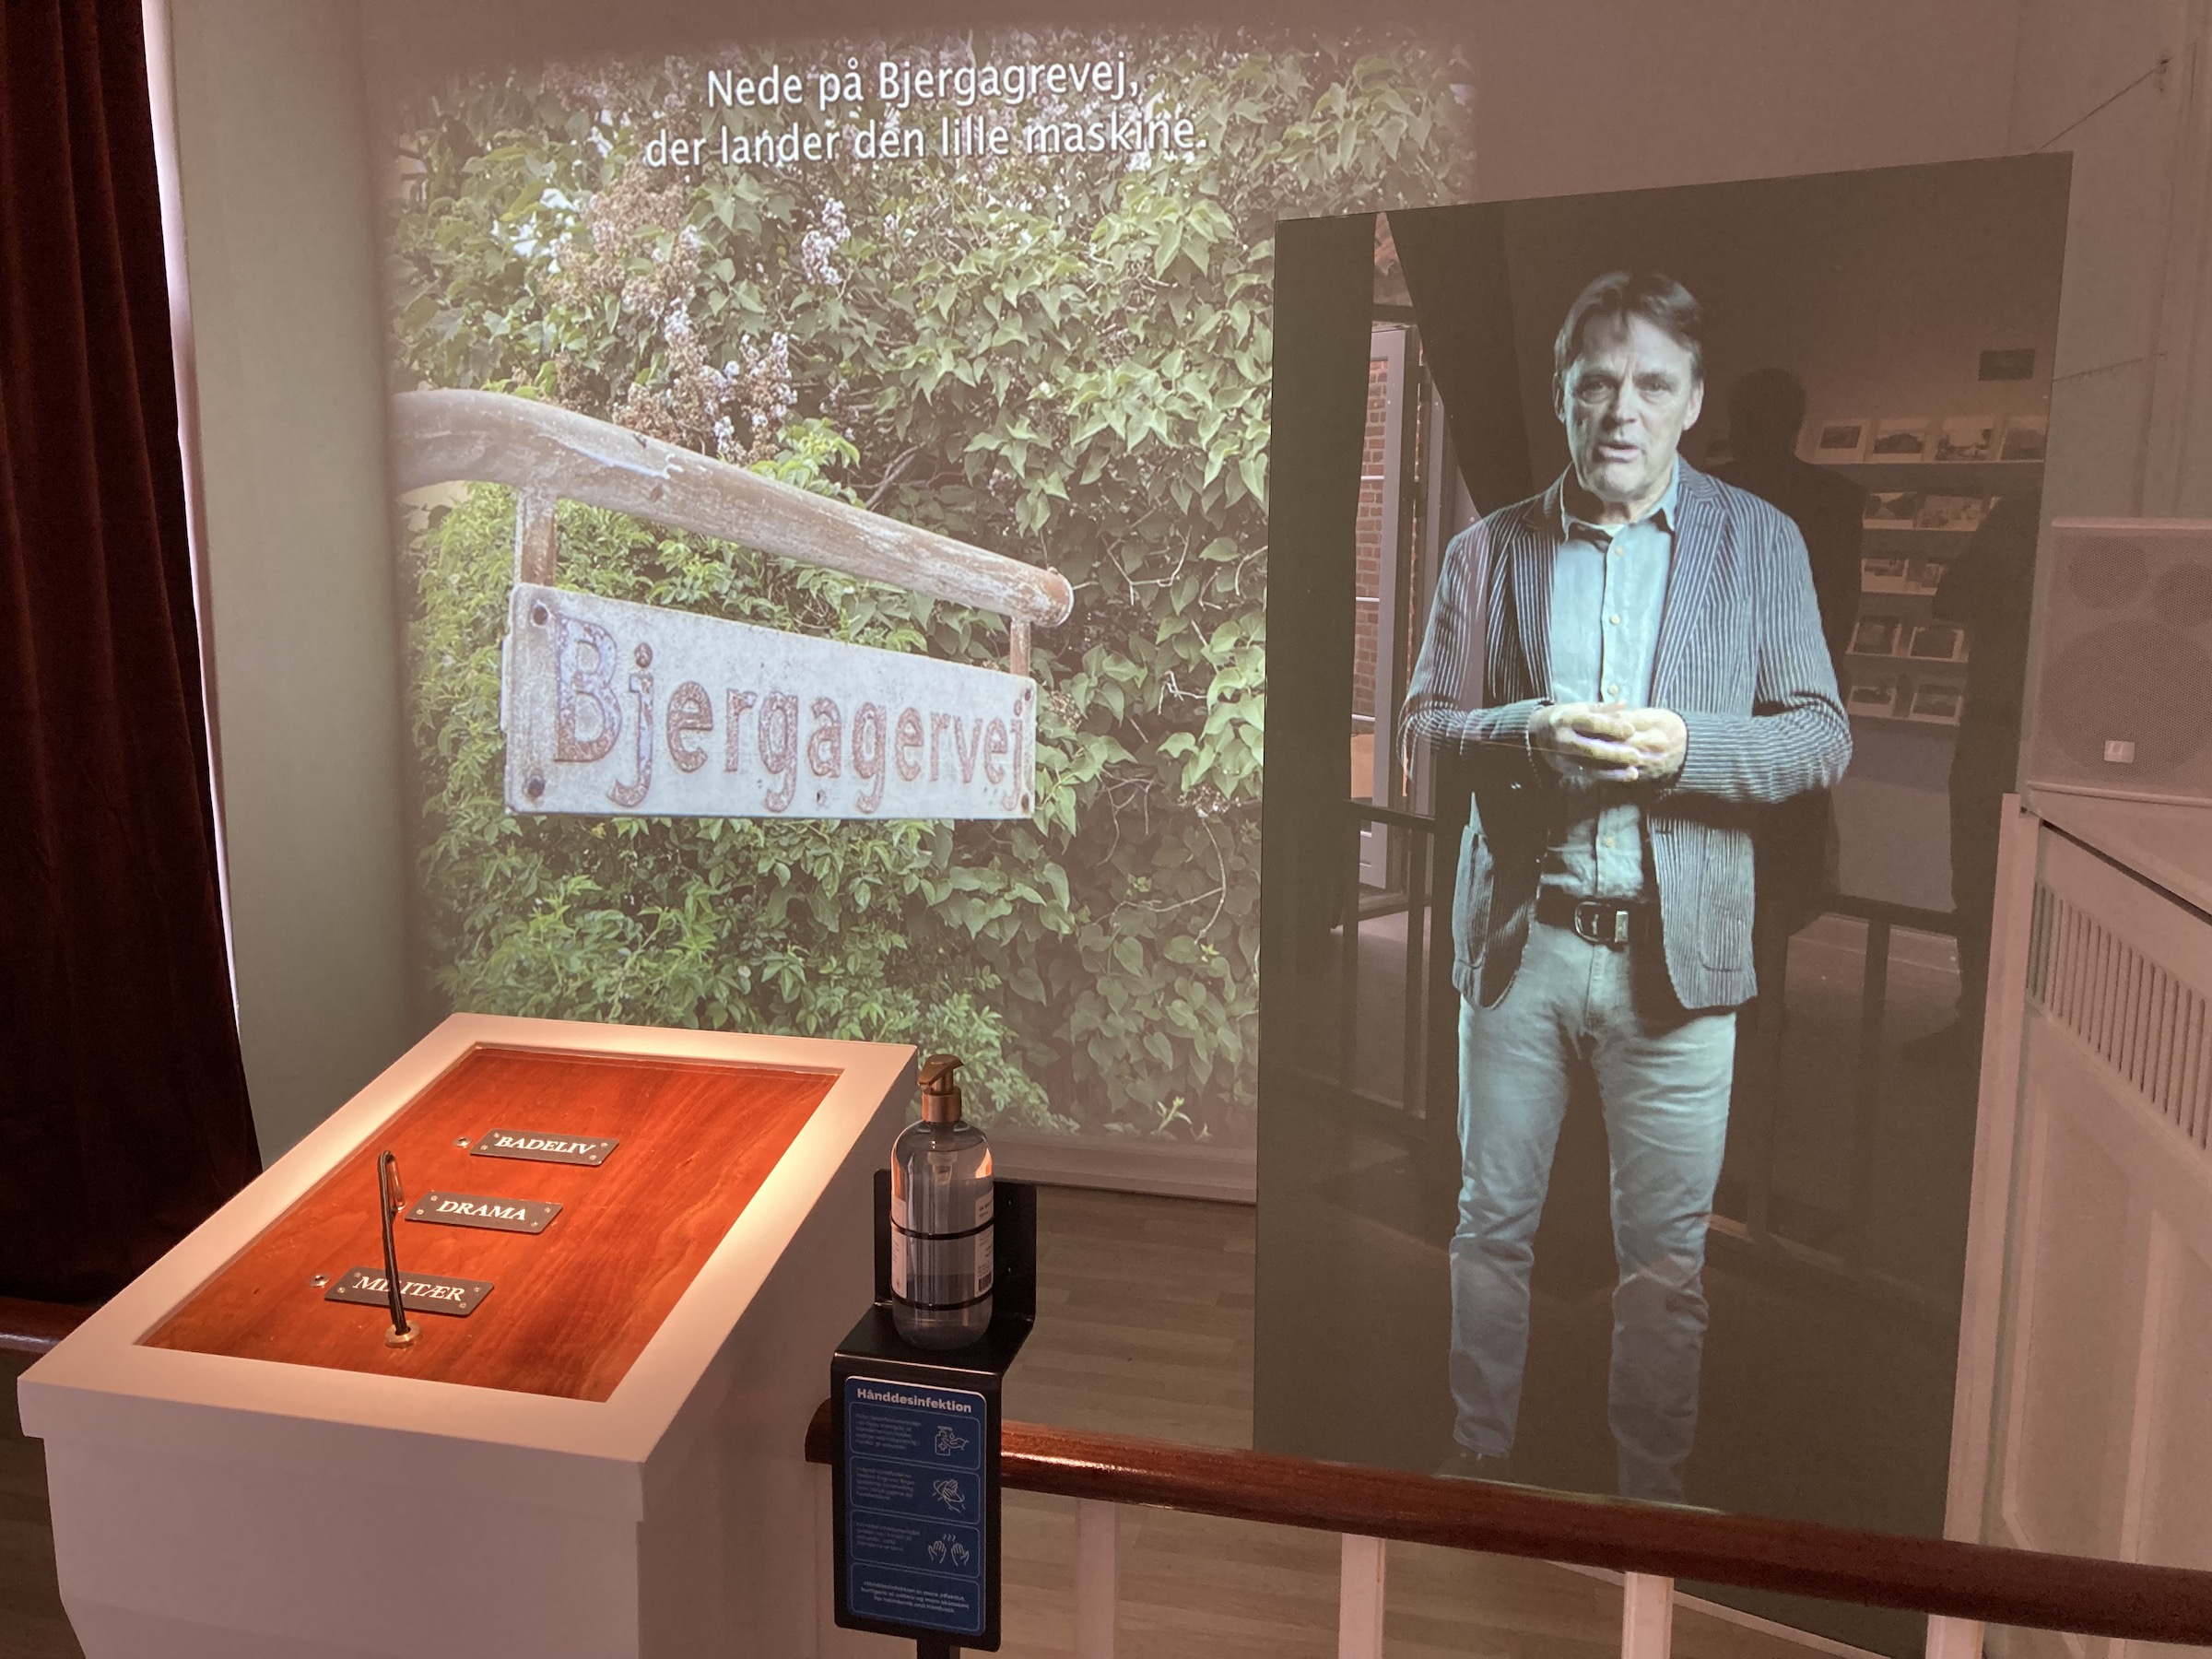
In collaboration with the in-house technician I brainstormed on different interactive artifacts. The inspiration came from inspiration gathered about the early 1900's, which is the style of the building and what we wanted everything to fit into.
We came up with a lot of ideas and ended up with three artifacts to be prototyped and tested.
Informal meeting presenting the ideas so far
Through illustrations, moodboard and sketches I communicated the progress to the rest of the employees at the museum. This resulted in fruitful discussion about the width of the video-experiences in regards to dissemination of content as well as the scope and physical form of the "archive cabinet", which is a central part of the whole experience. Throughout these discussion the personas provided a concrete reference point for all participants.
3D modelling
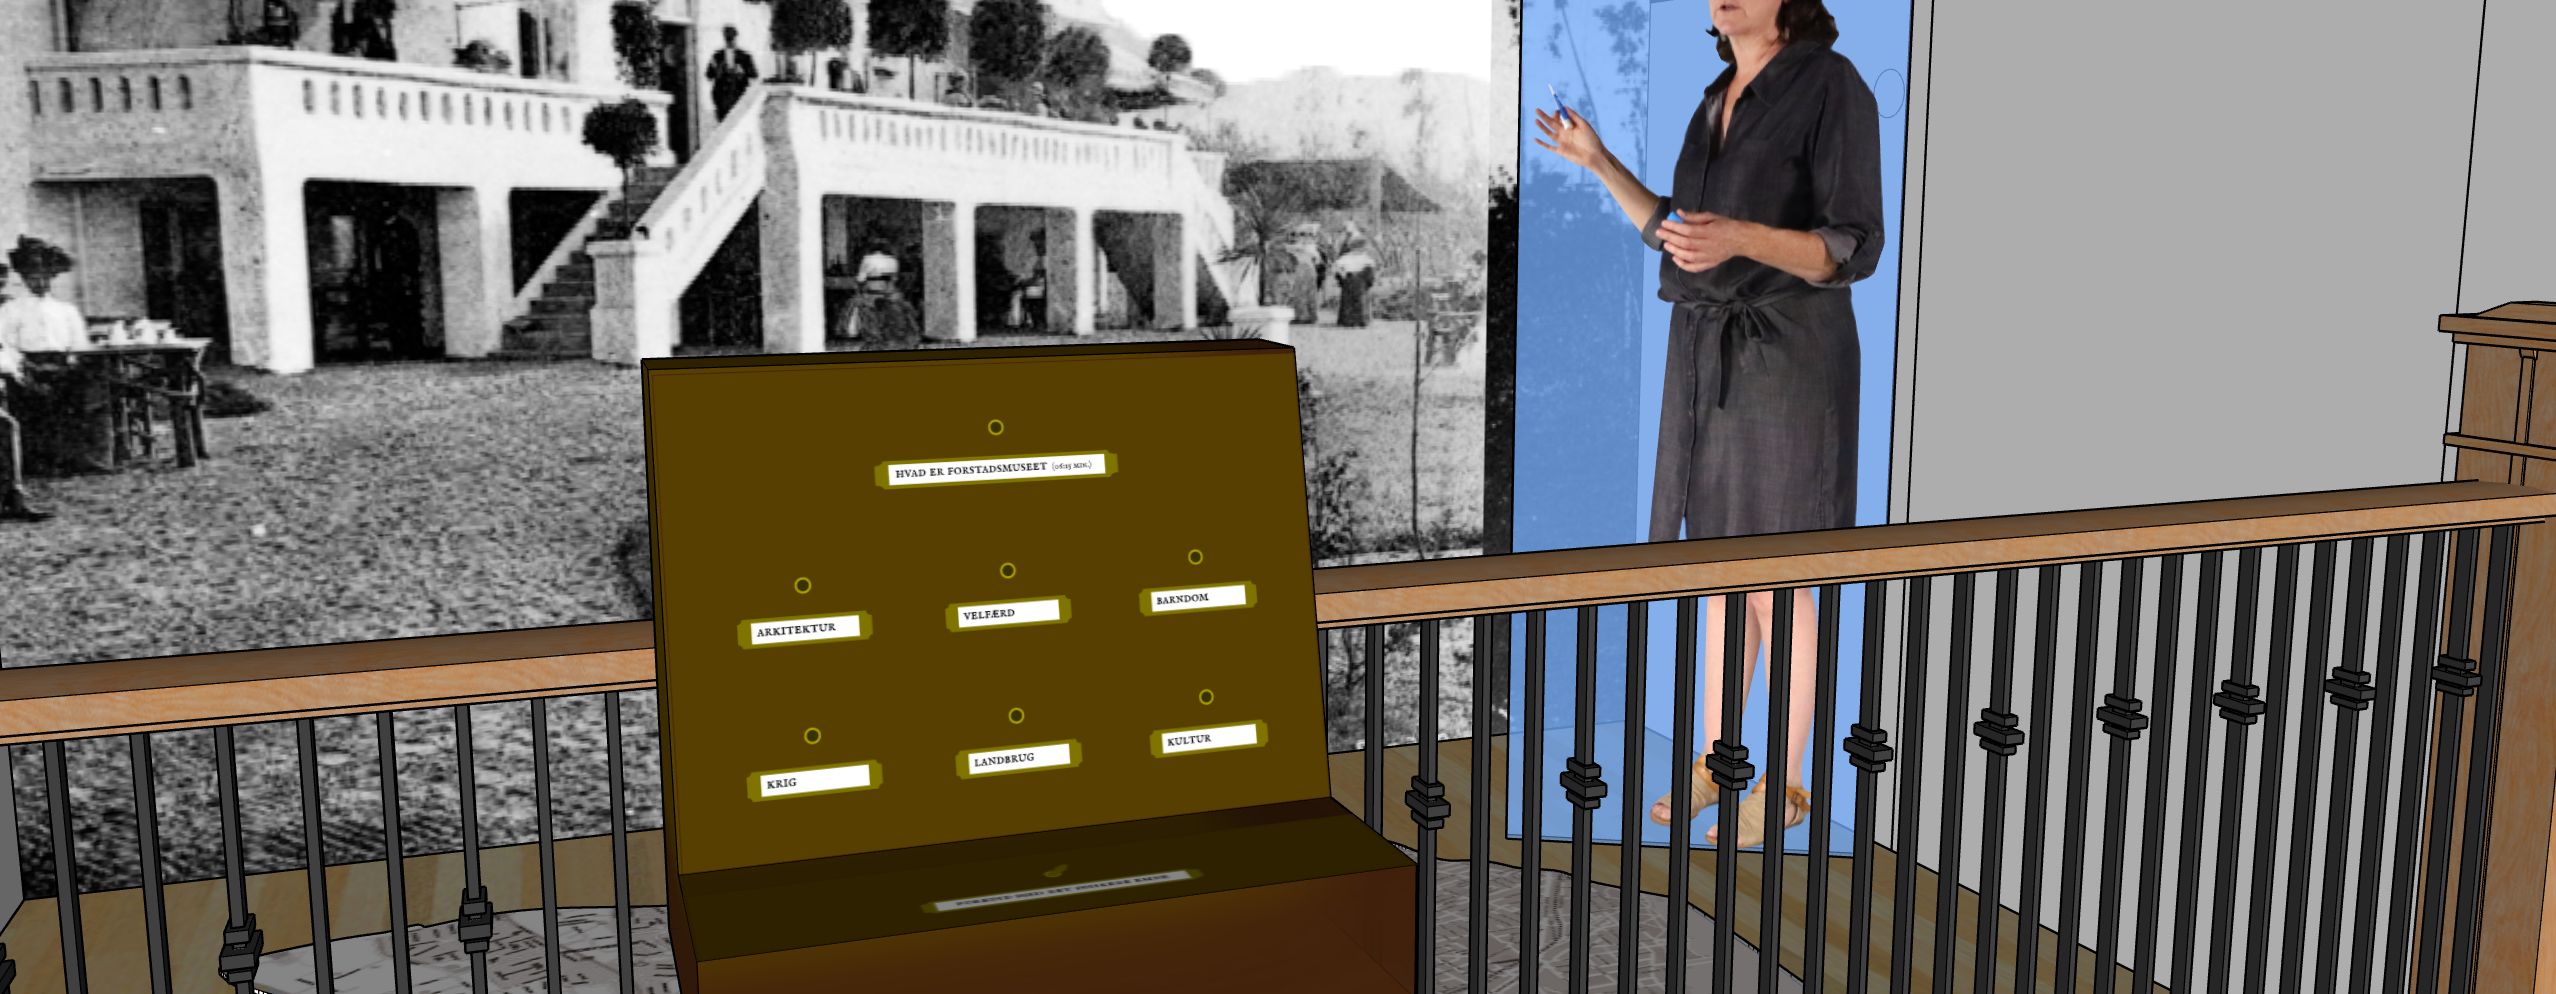
To illustrate and concretize the ideas I started to 3D model using SketchUp. Through discussions the concept of the storyteller changed from part of the video material to a kind of hologram in it self projected onto a glass plate in front of the video.
Experience prototyping and discussions in team
To facilitate fruitful discussions and to keep the rest of the team informed an experience prototype was made in the exhibition space. This included amongst other things a dummy video of the hologram storyteller, a dummy video with archival material, dummy archival materials for the "archive cabinet", etc.
Photo from the experience prototype.
Photo from the experience prototype.
Photo from the experience prototype.
Photo from the experience prototype.
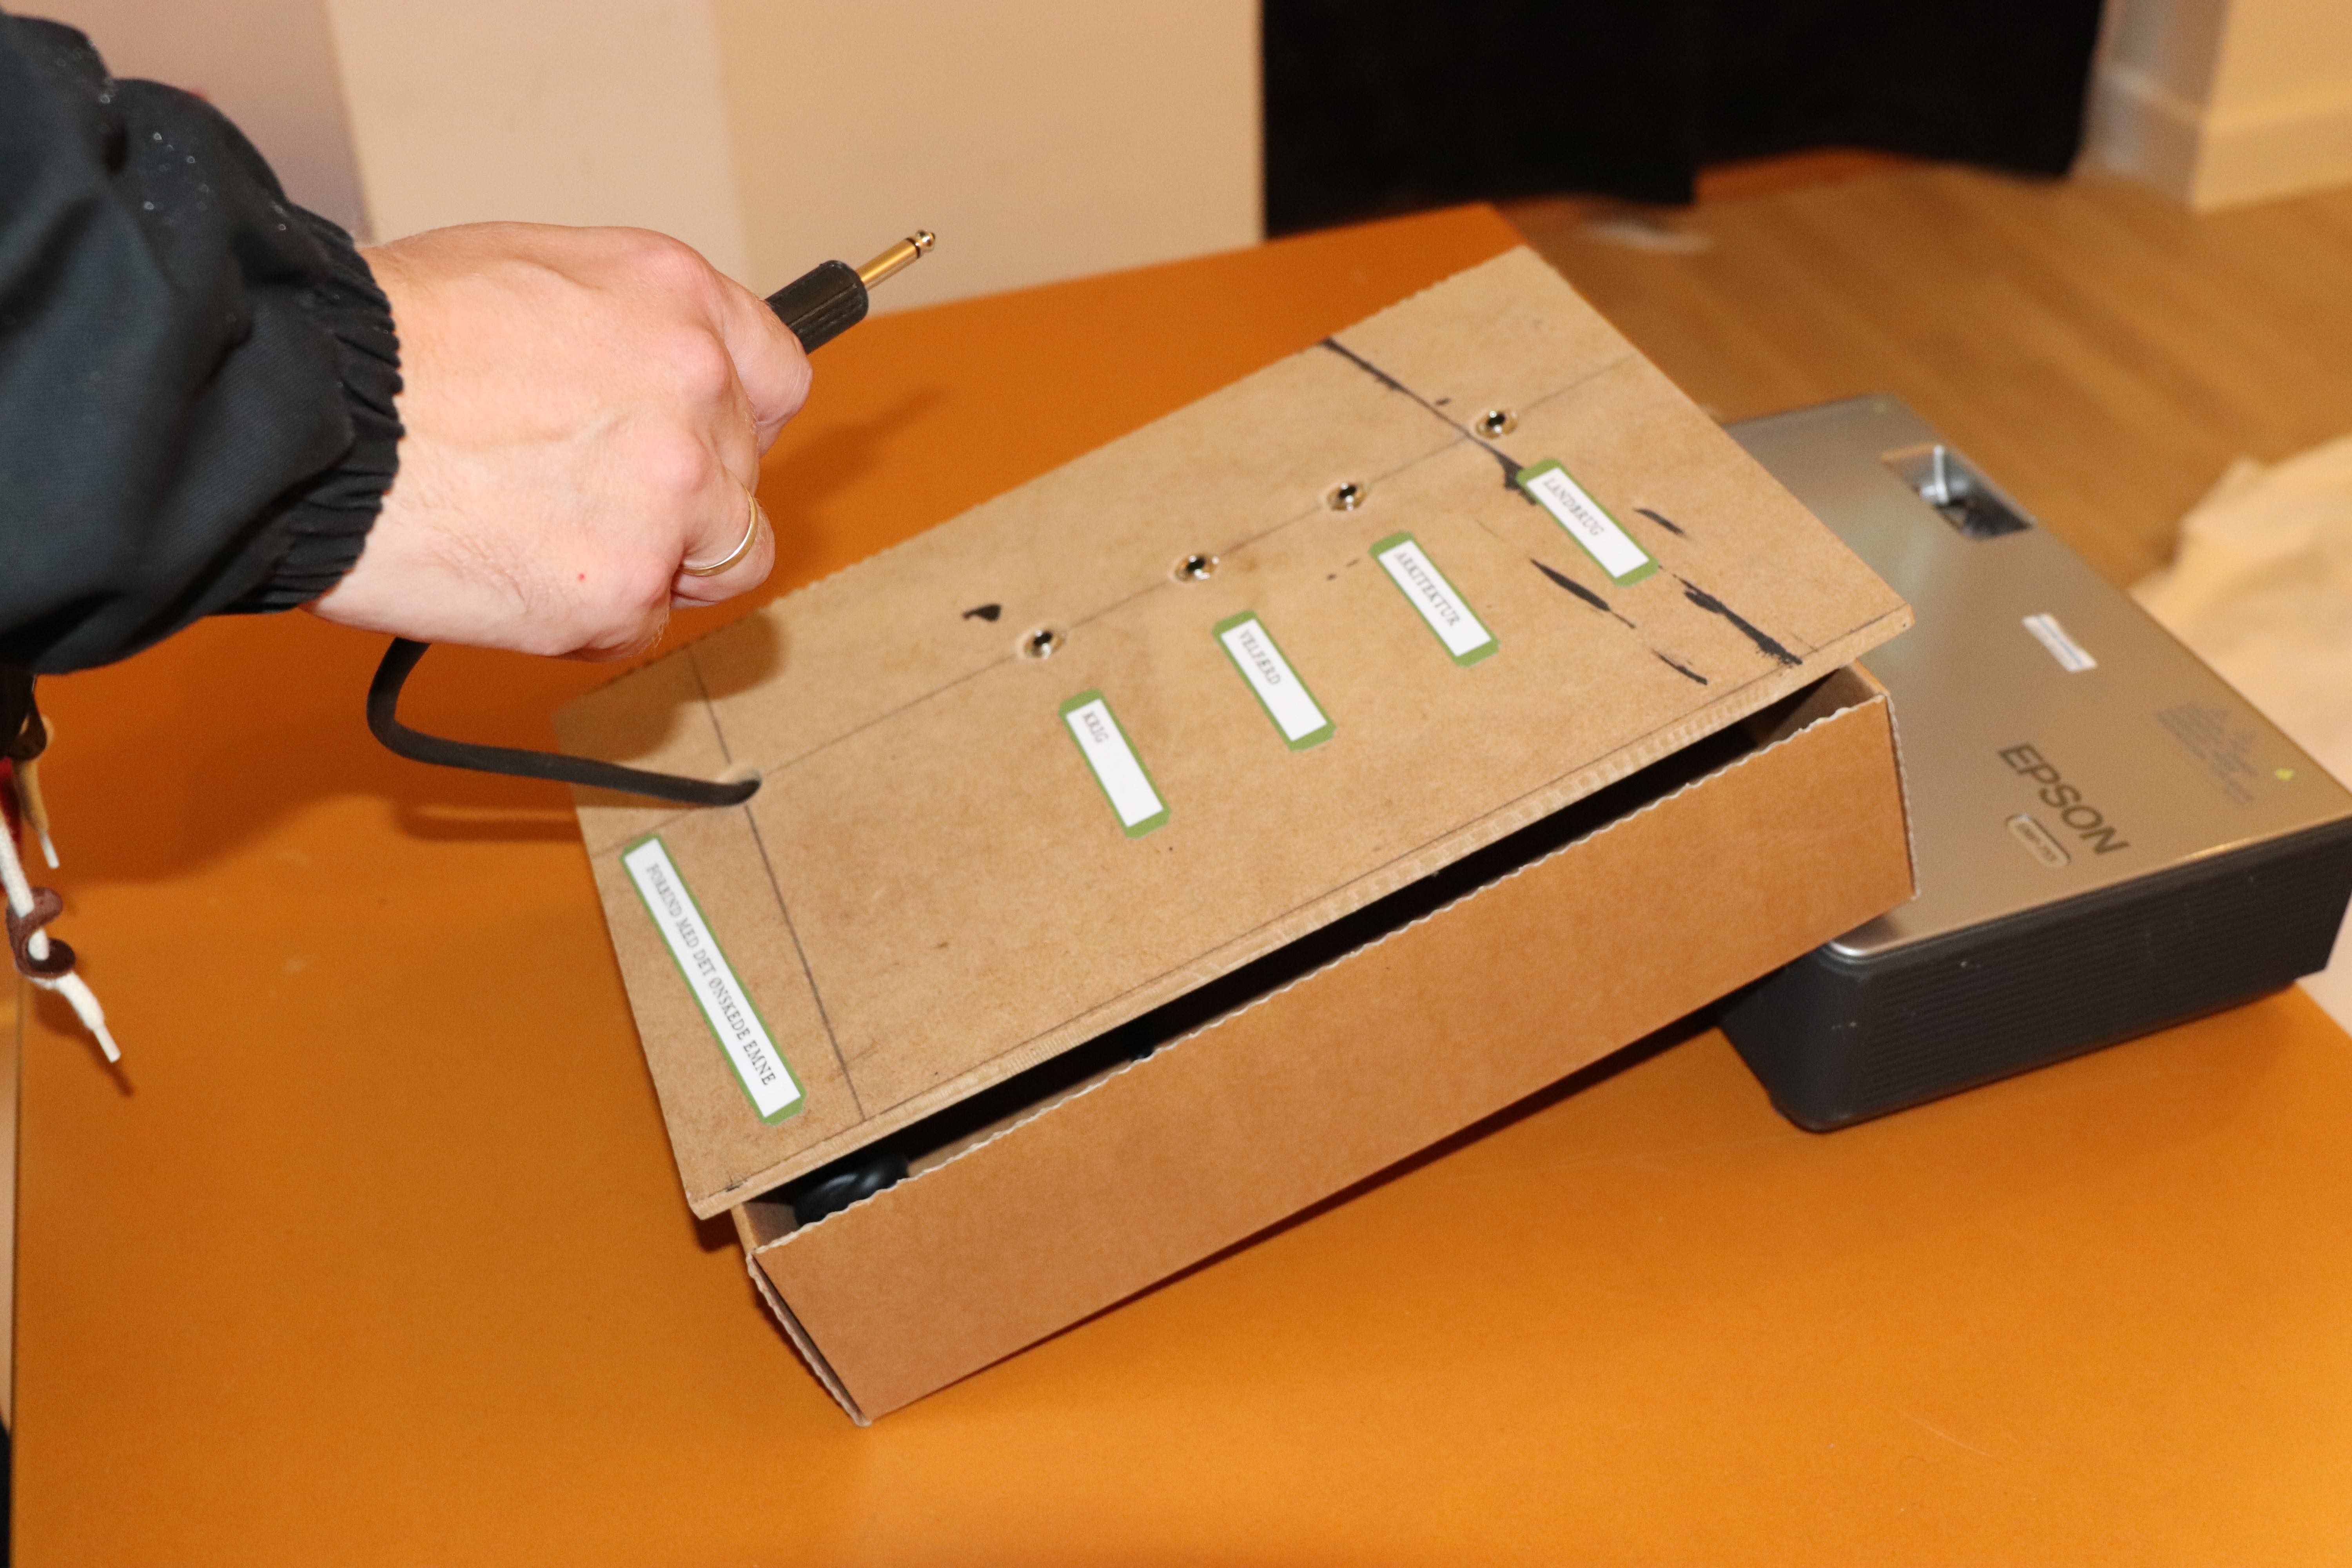
Prototypes and interaction logic
The prototypes were built using the bare minimum materials in order to test out whether user would find the interactions intuitive. The interaction logic was also decided for all three prototypes; e.g. what happens when you press a button when a movie is ongoing?
Interaction logic for each prototype.
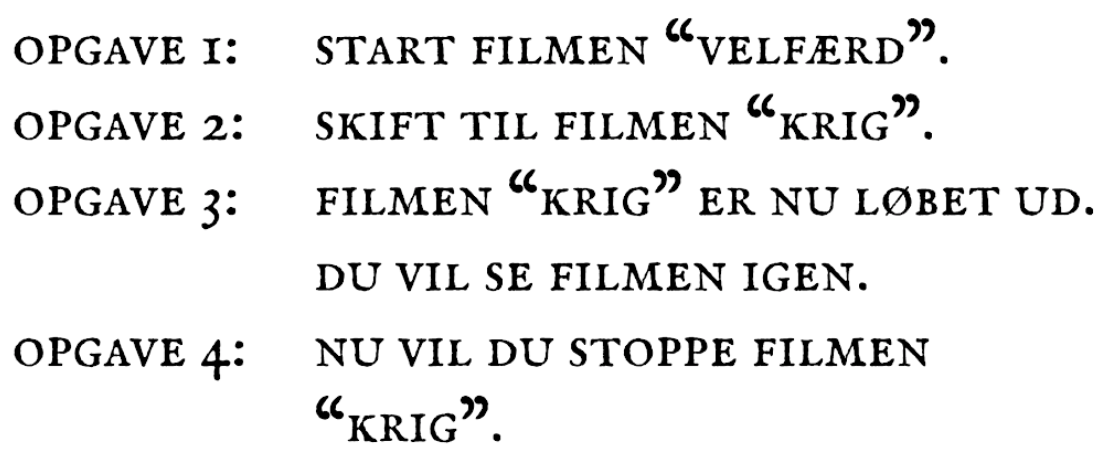
User testing
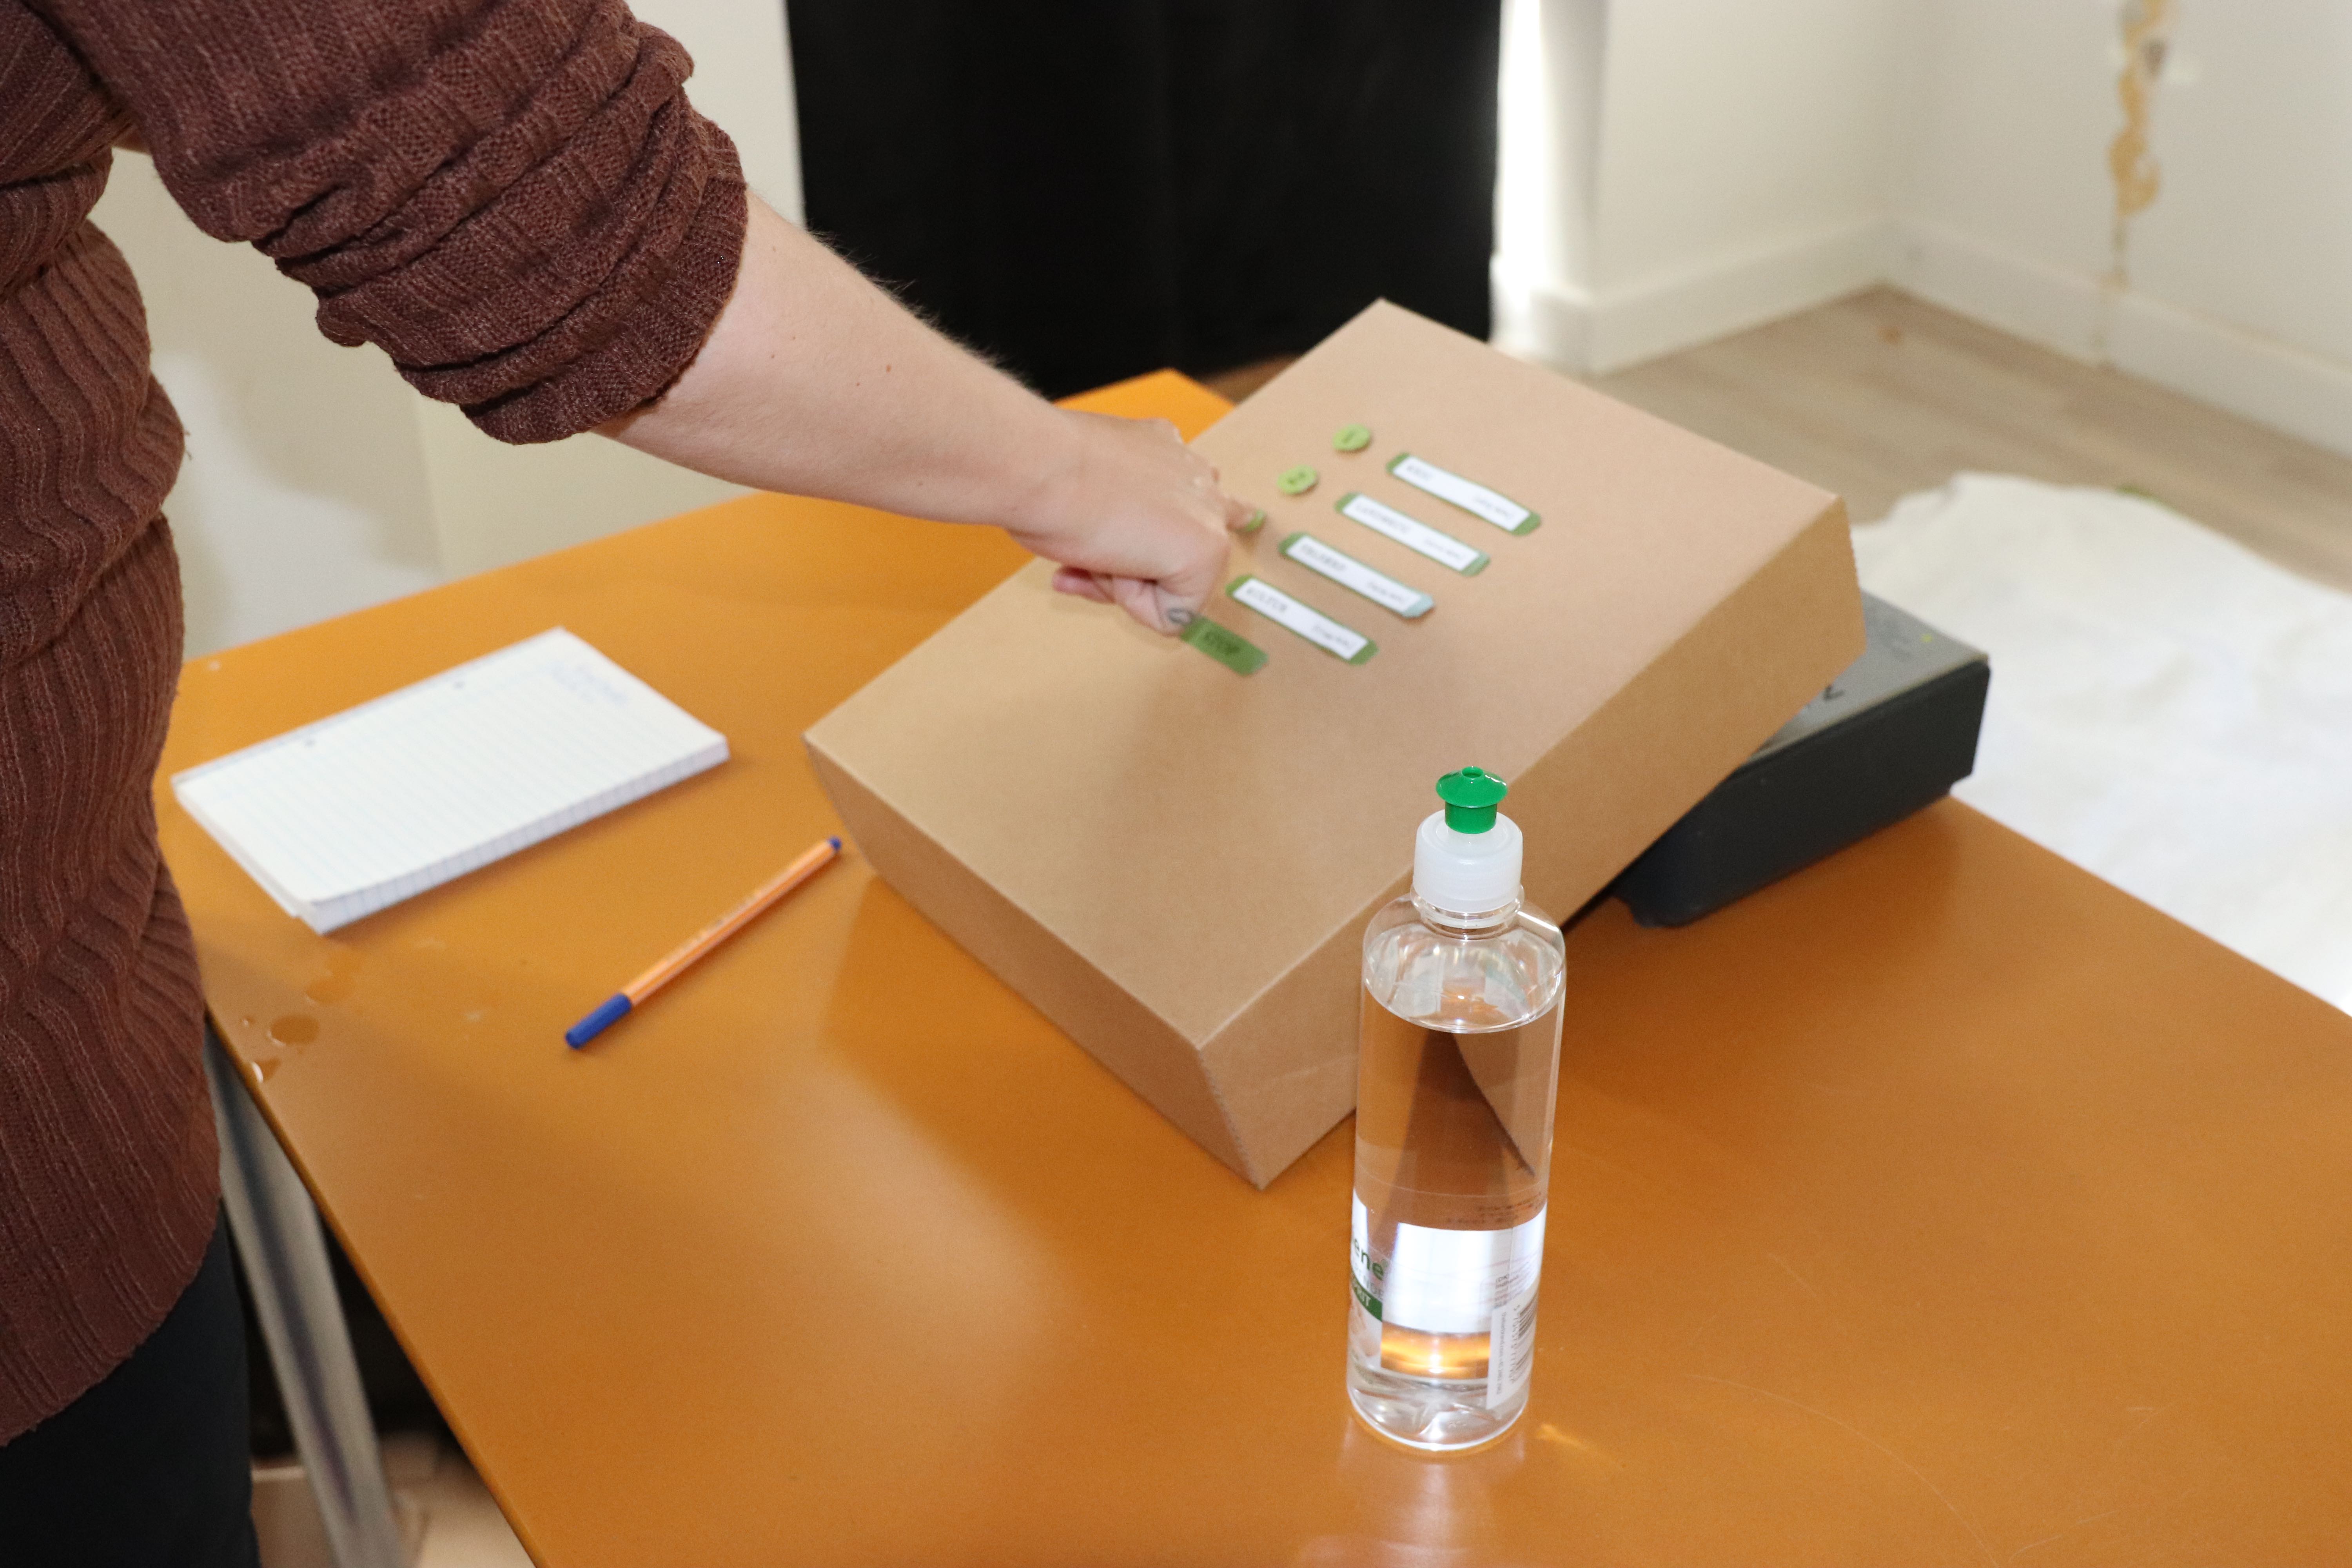
We wanted to test whether the users found the interactions intuitive so no instructions were given other than those in the image below. One person observed and took notes and the other facilitated the user test by giving "tasks" and telling the user what "happens" during the test since nothing will actually happen when e.g. a button is pressed. We tested all three prototypes with 6 people (3 men, 3 women) of ages ranging from 36 to 68. The results pointed towards the first prototype.
"Tasks" for the user tests.
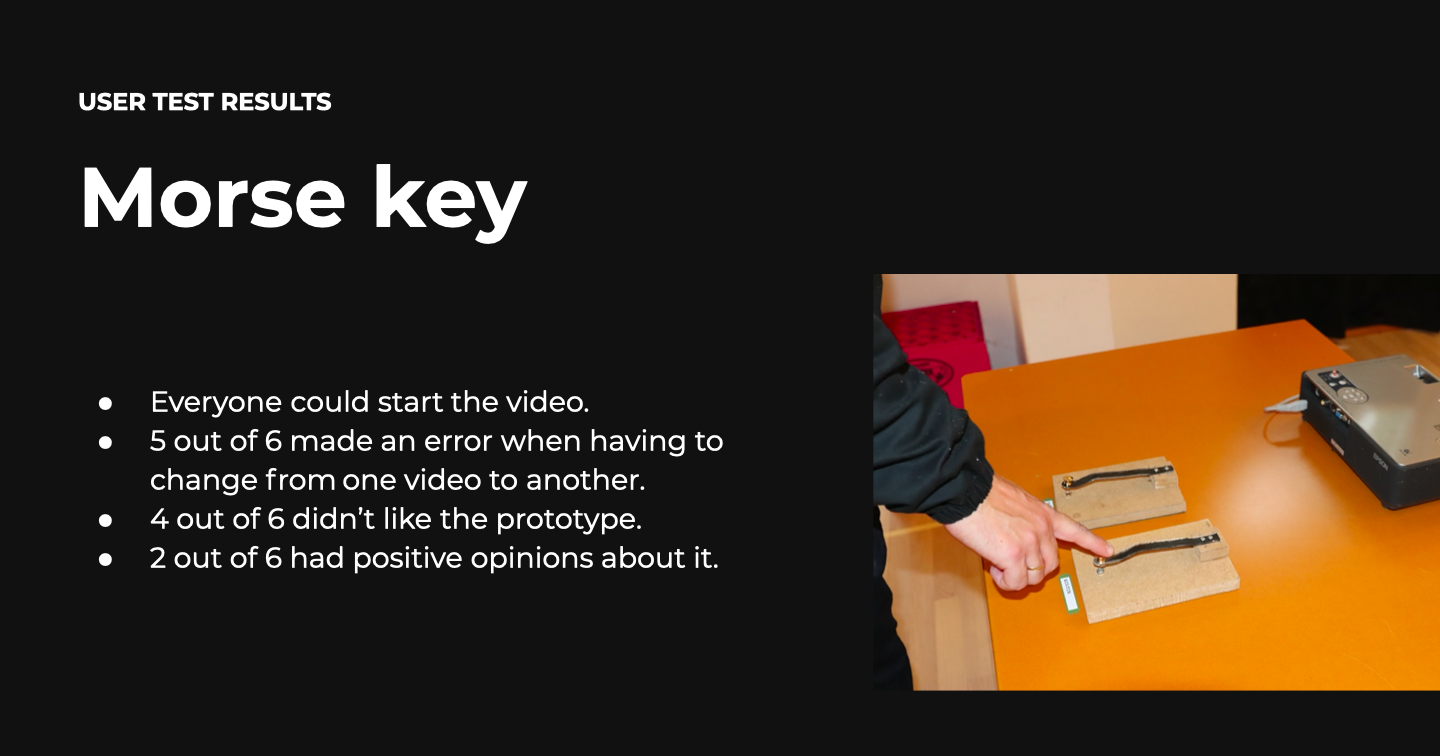
Summary of findings: User tests of prototype #1.
Summary of findings: User tests of prototype #2.
Summary of findings: User tests of prototype #3.
Crazy 8
One of the components in the exhibition that was still a bit undefined was the "archive cabinet", since the scope and format presented a few considerations to be made in regards to security and preservation. Therefore I decided to do a Crazy 8 alongside the inhouse technician to come up with possible alternatives to this problem.
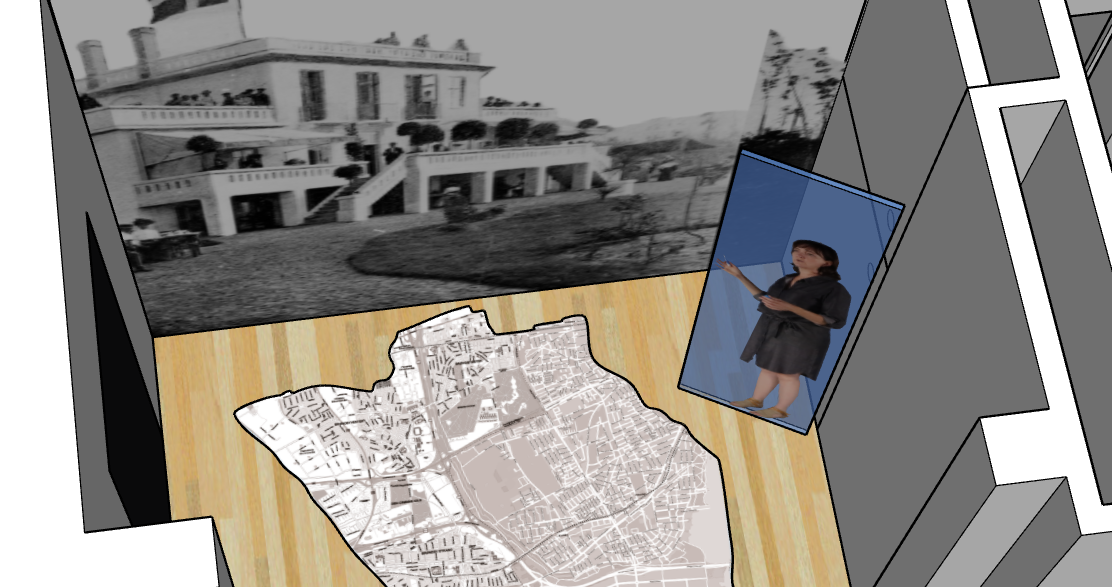
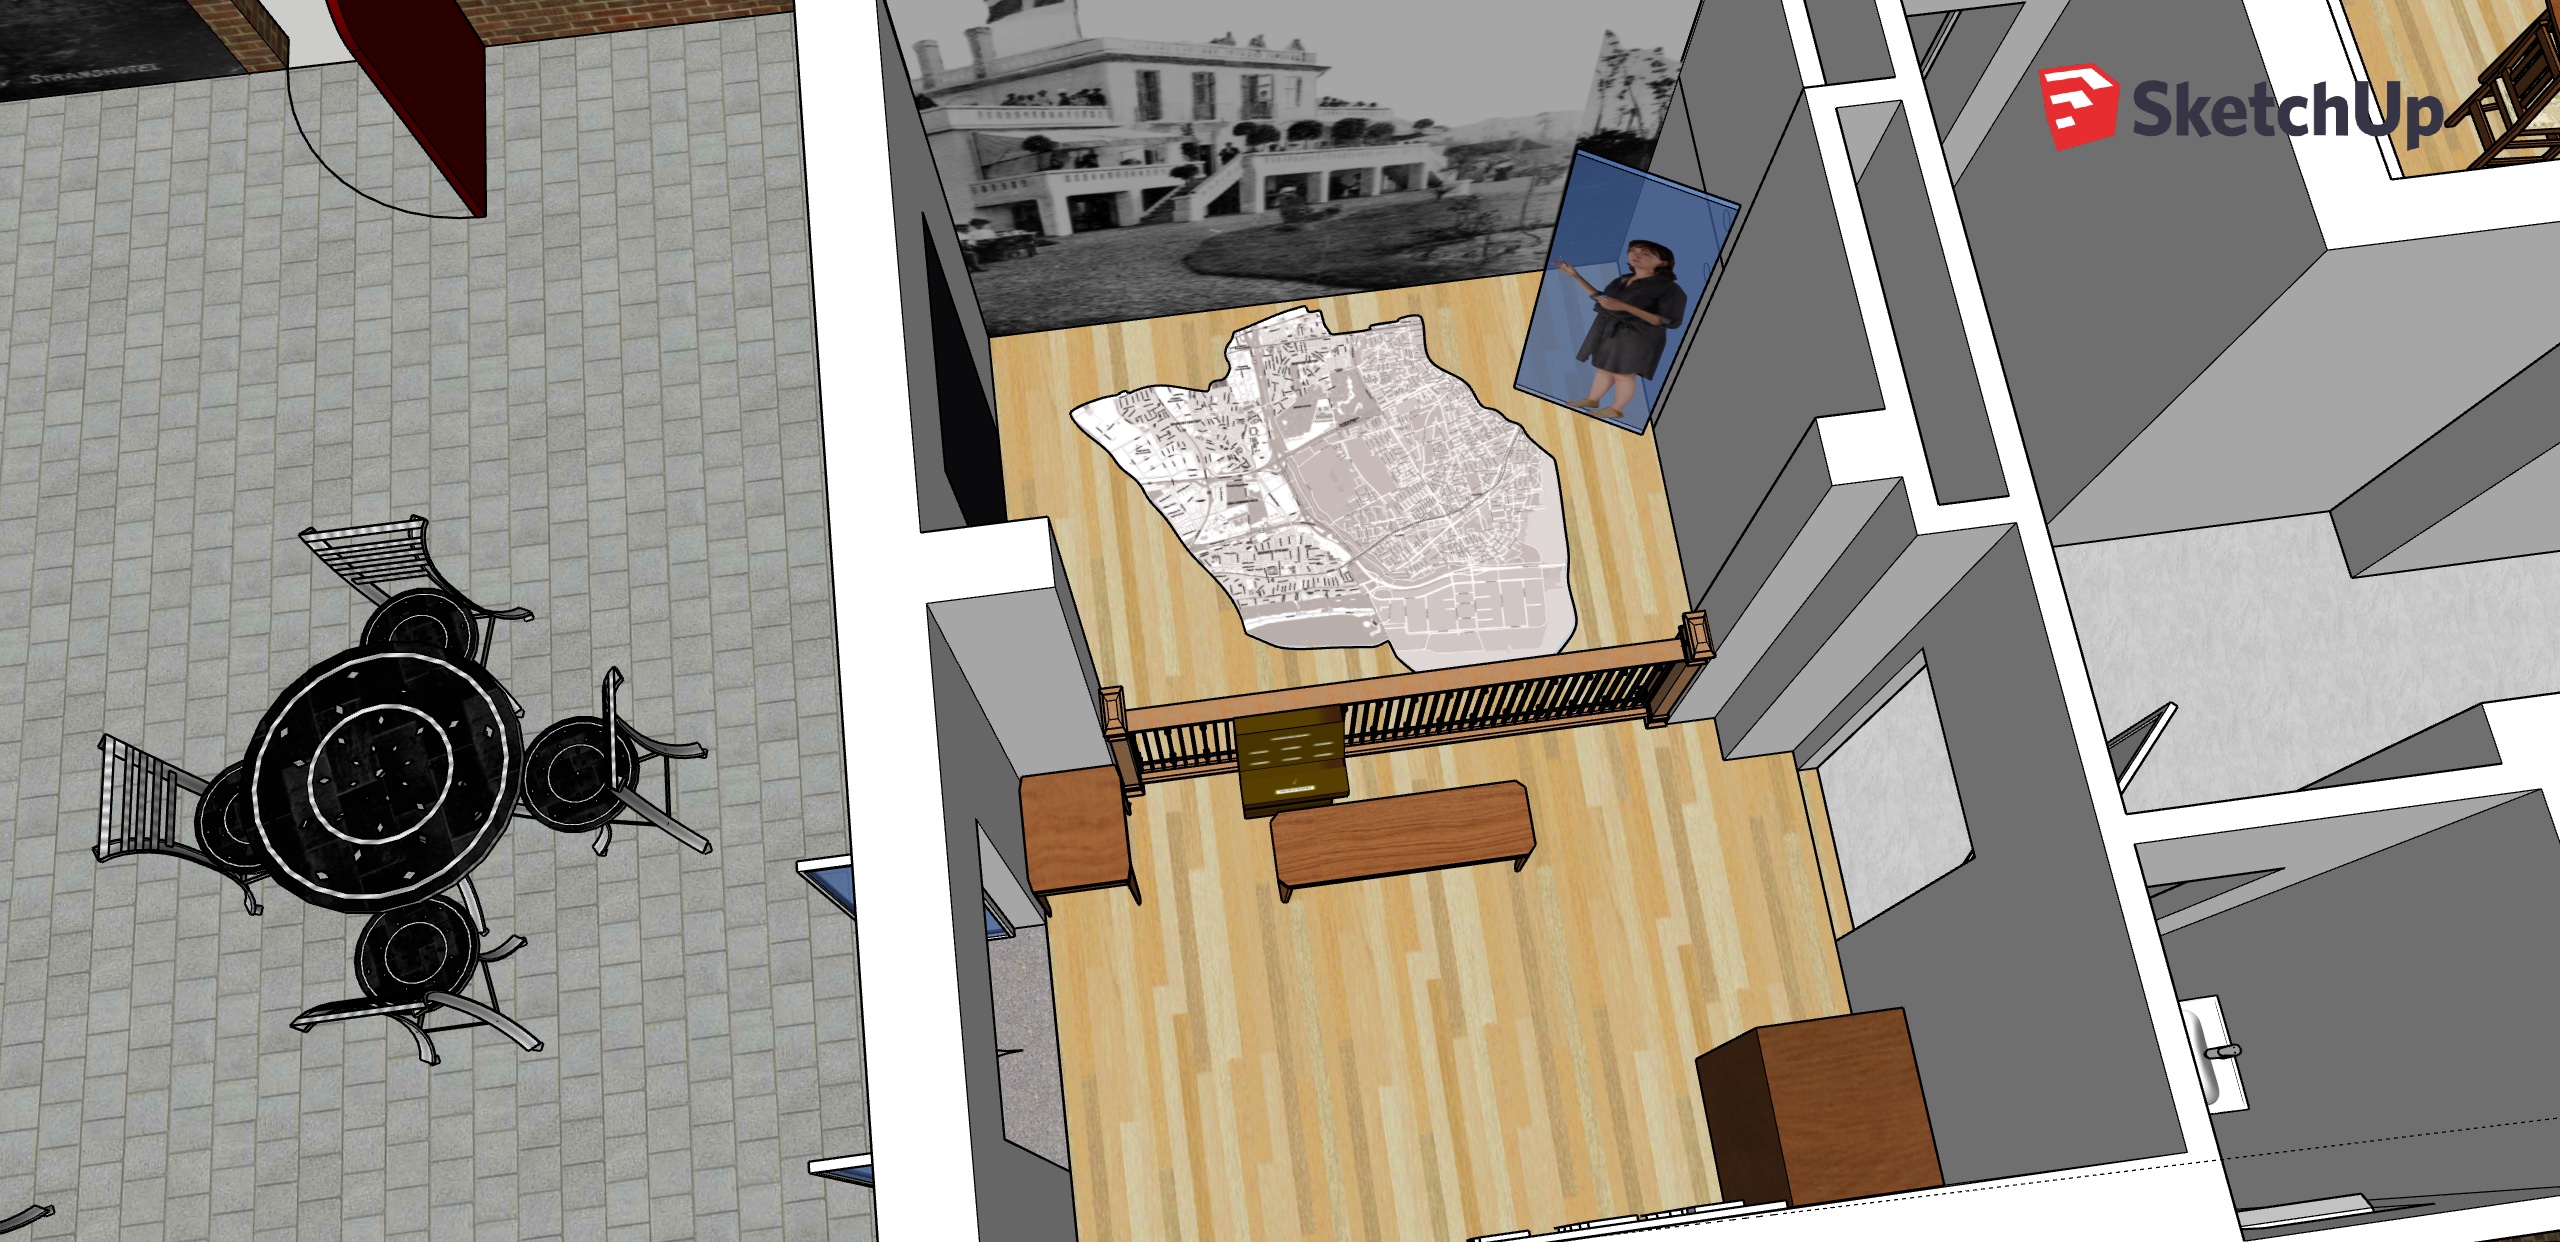
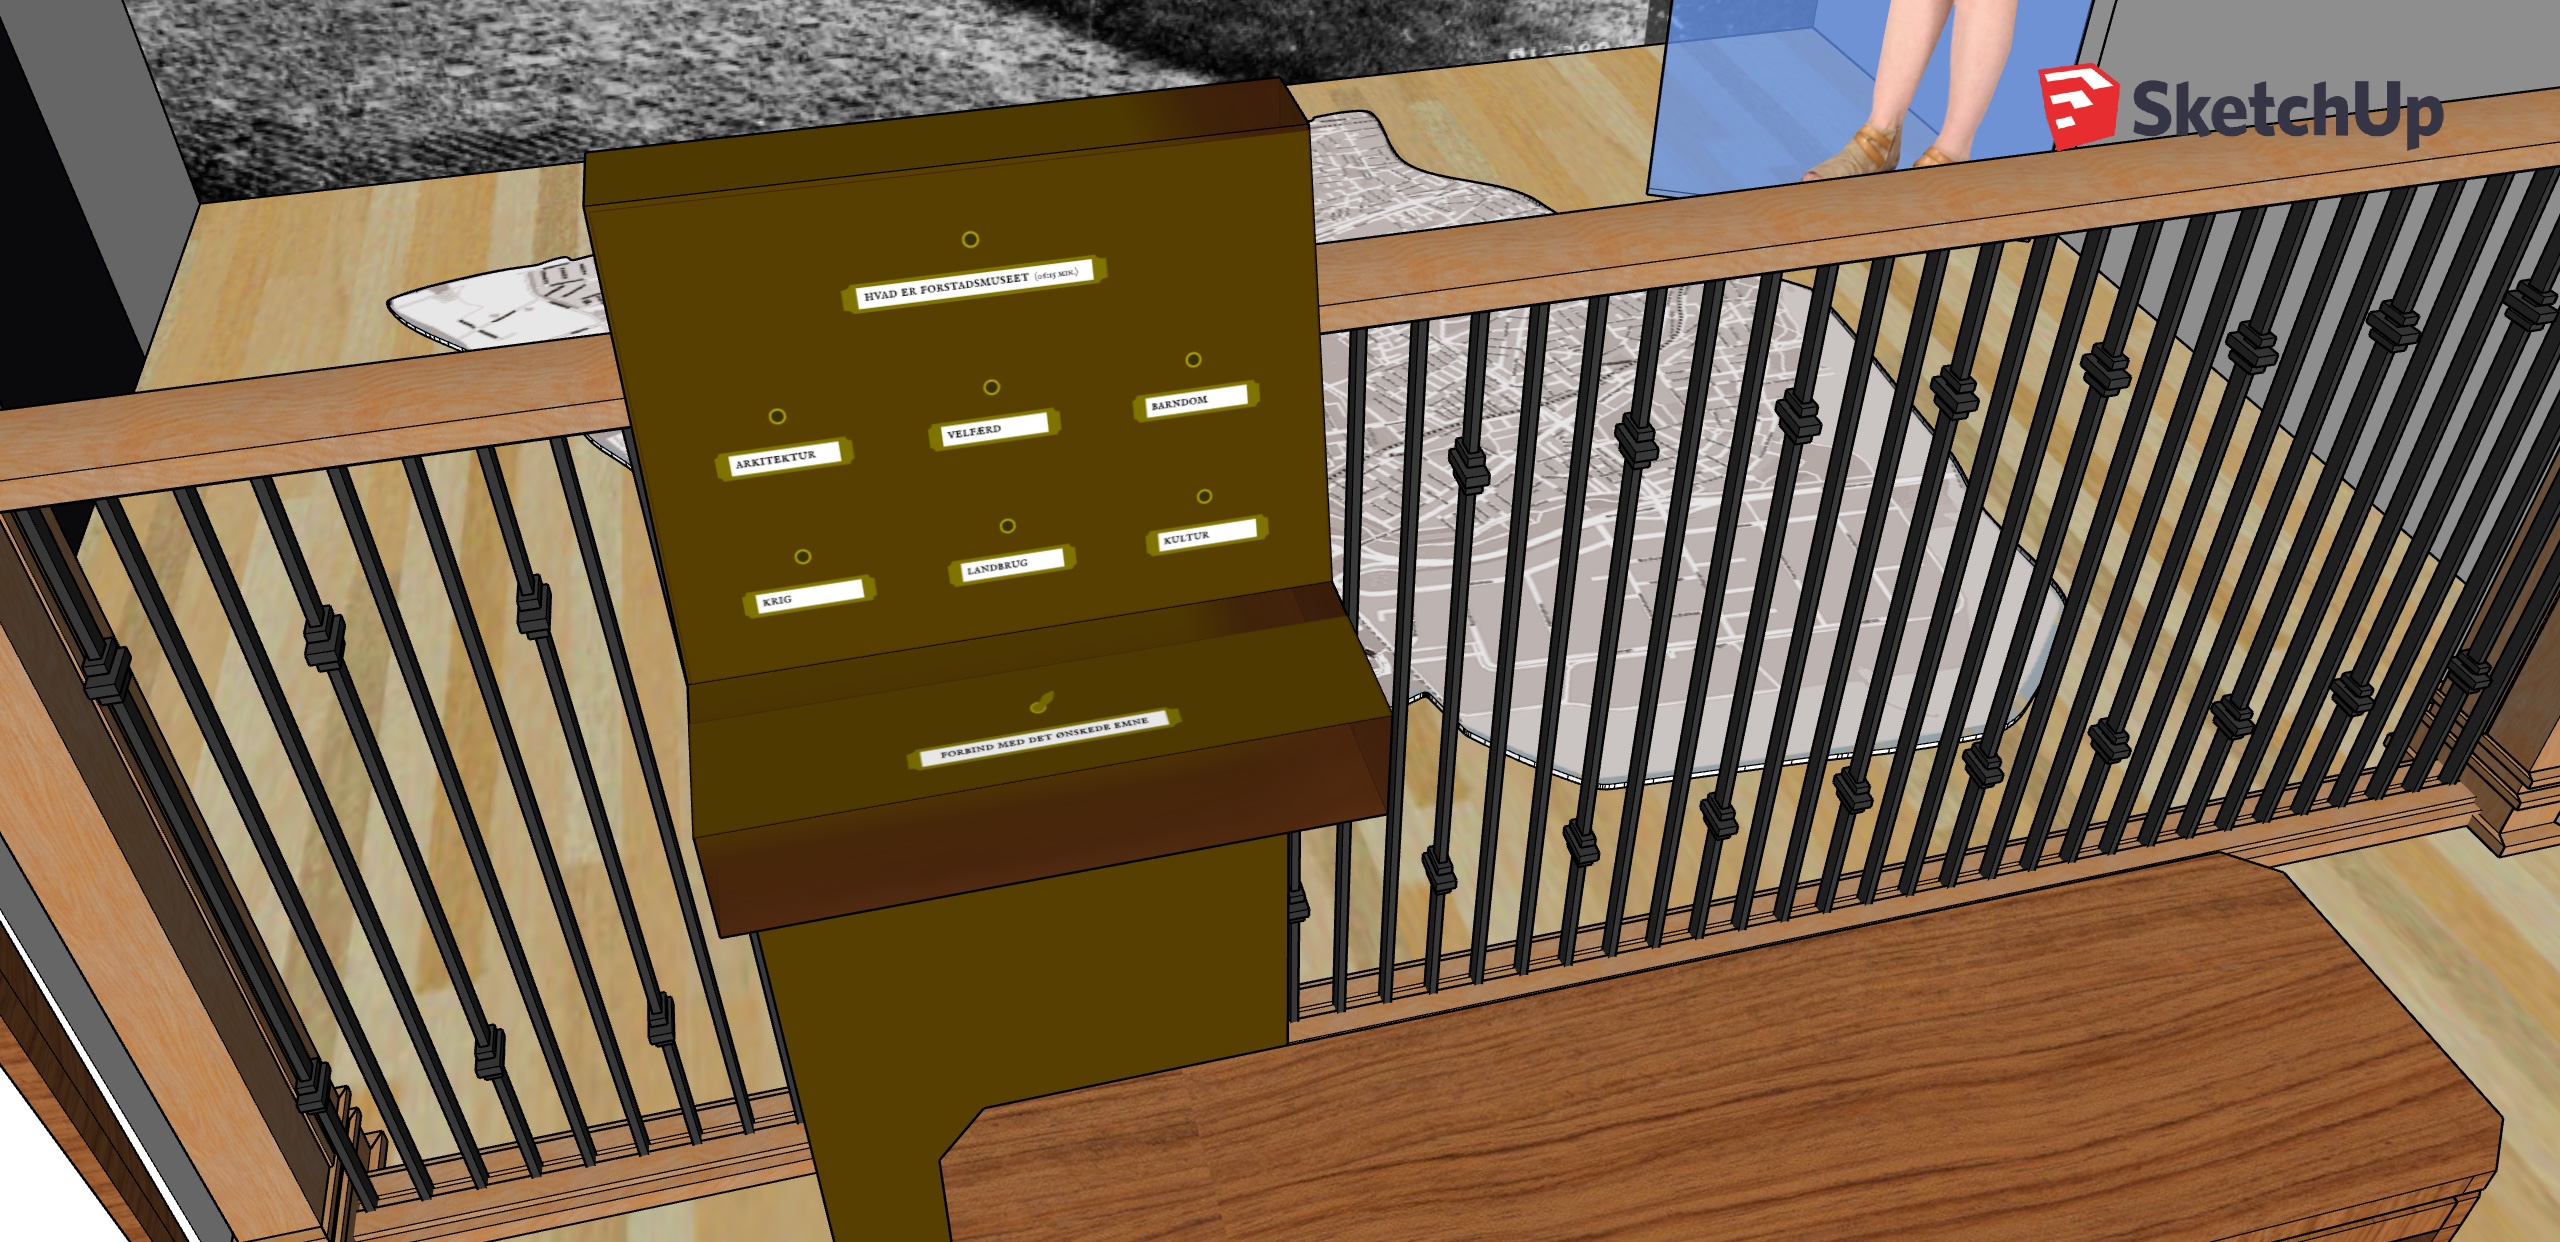
Final exhibition design
Below you will find 3D models of the final exhibition design for Historieporten.
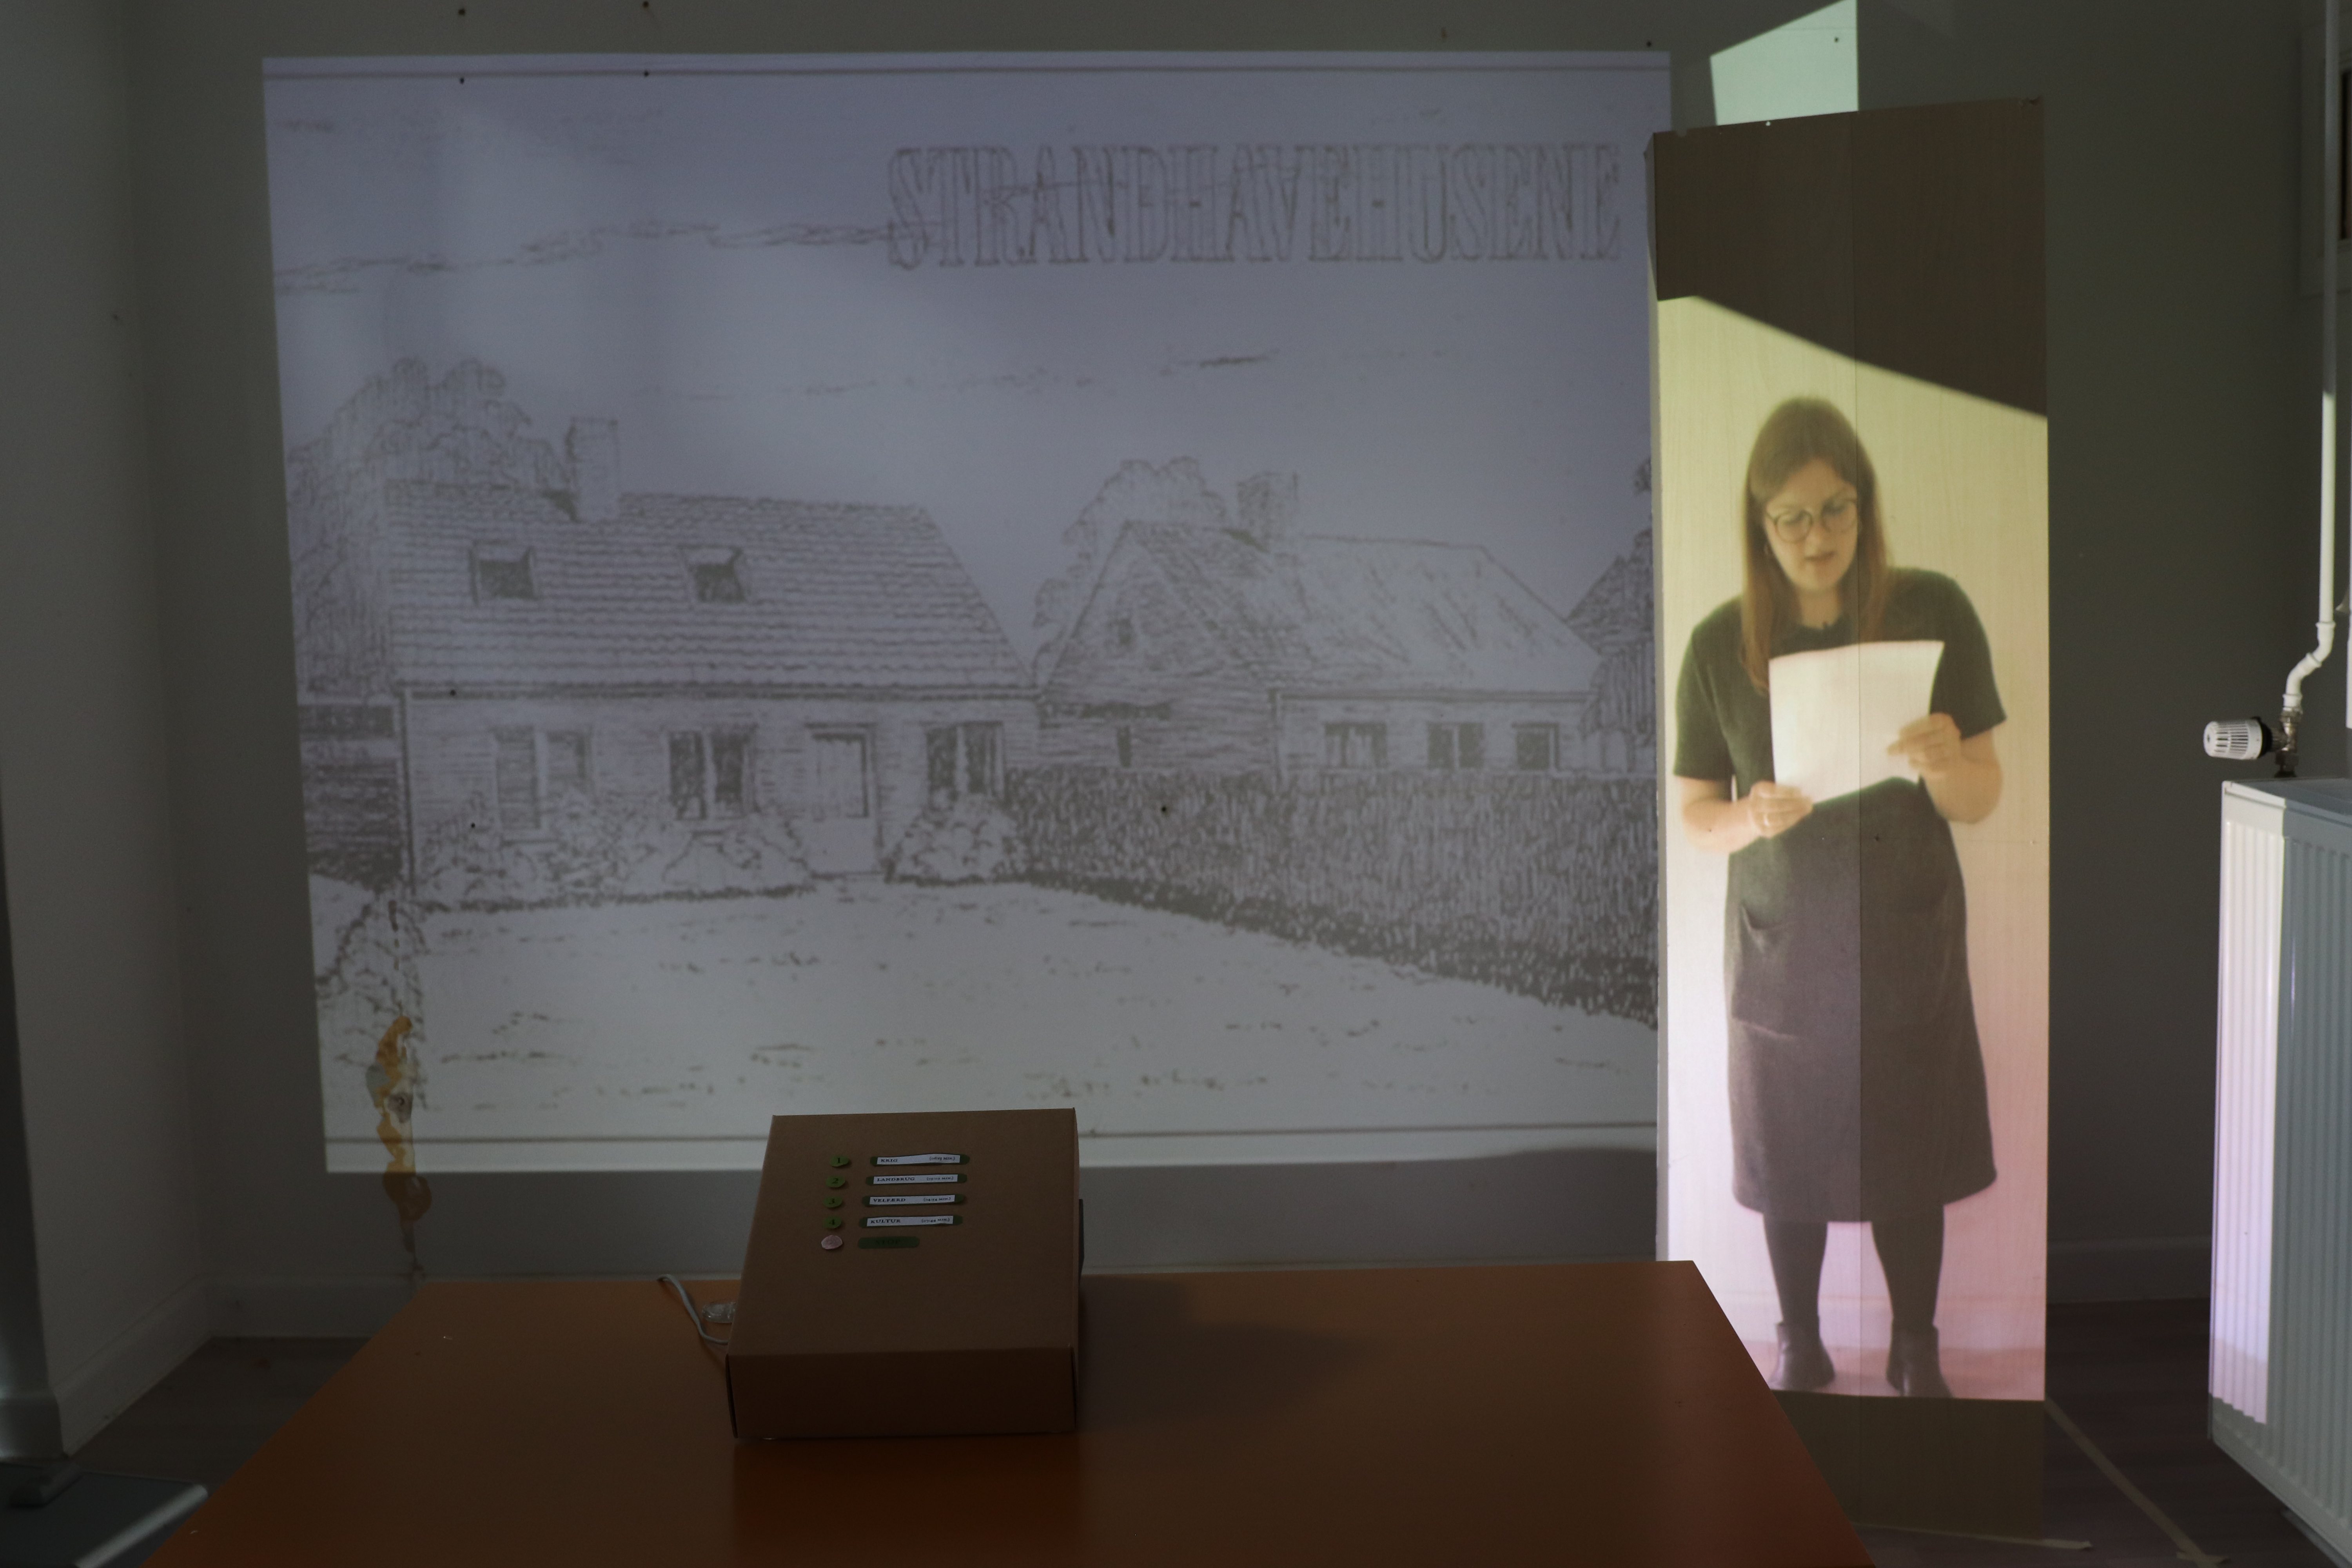
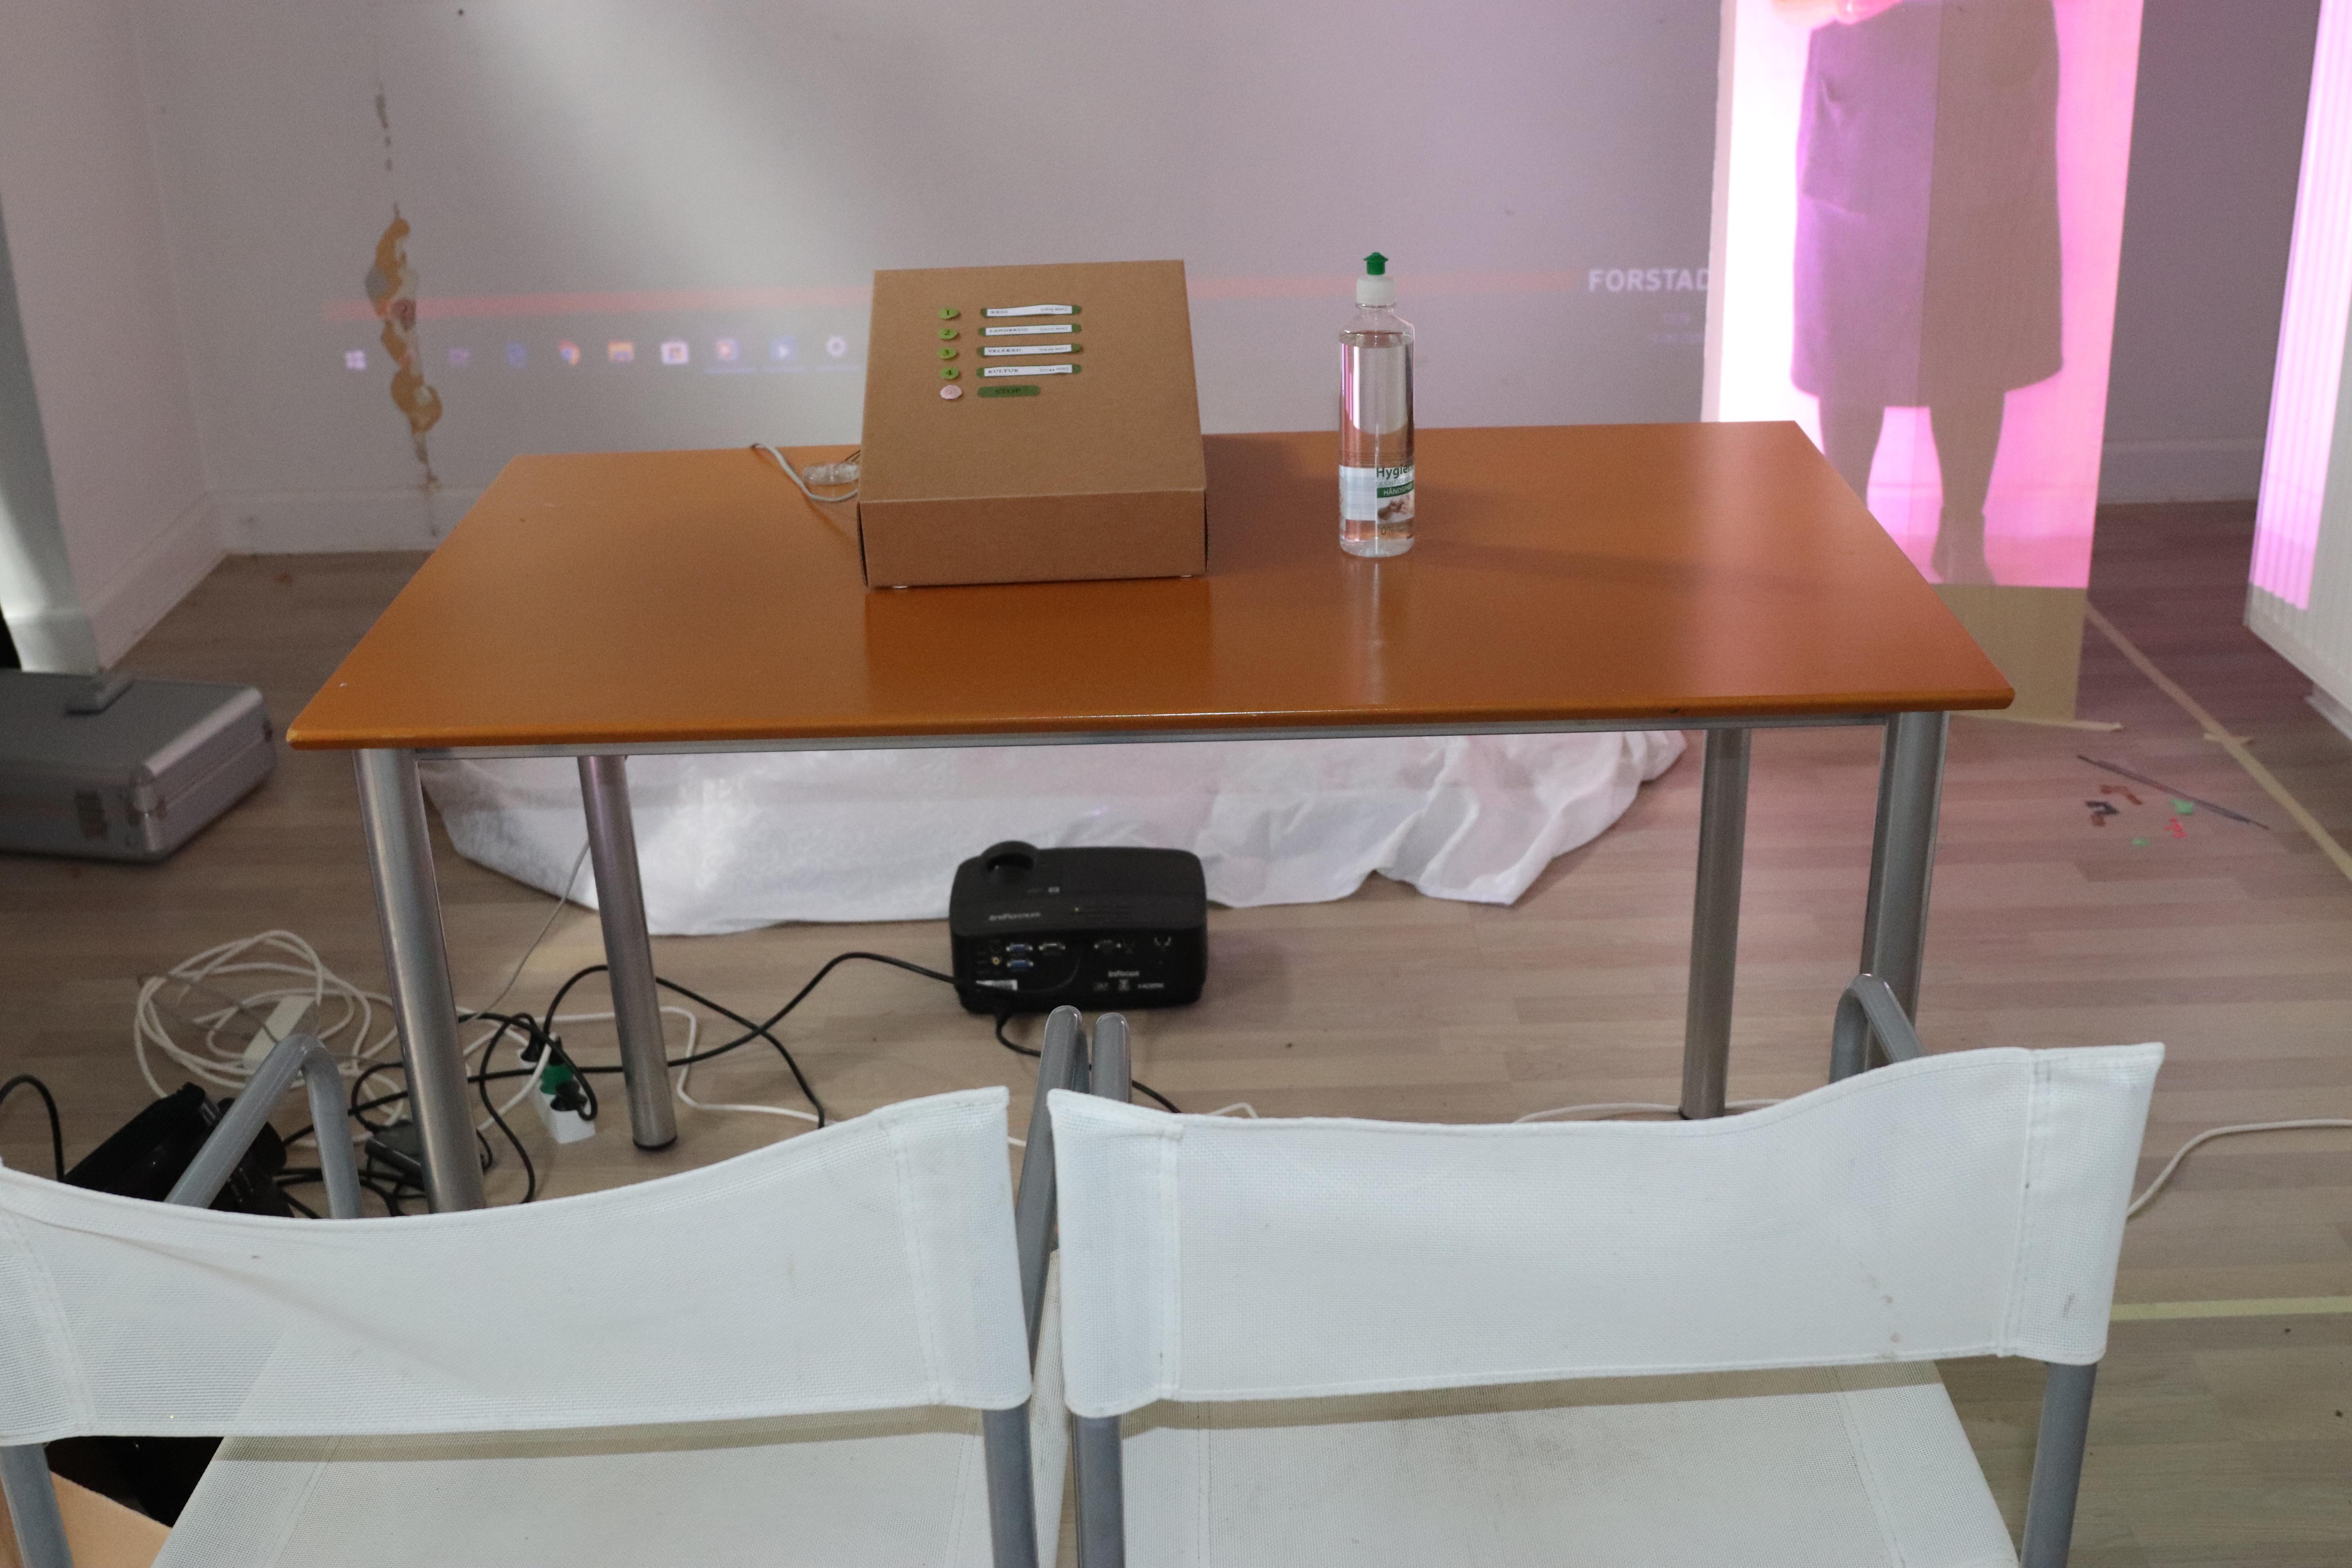
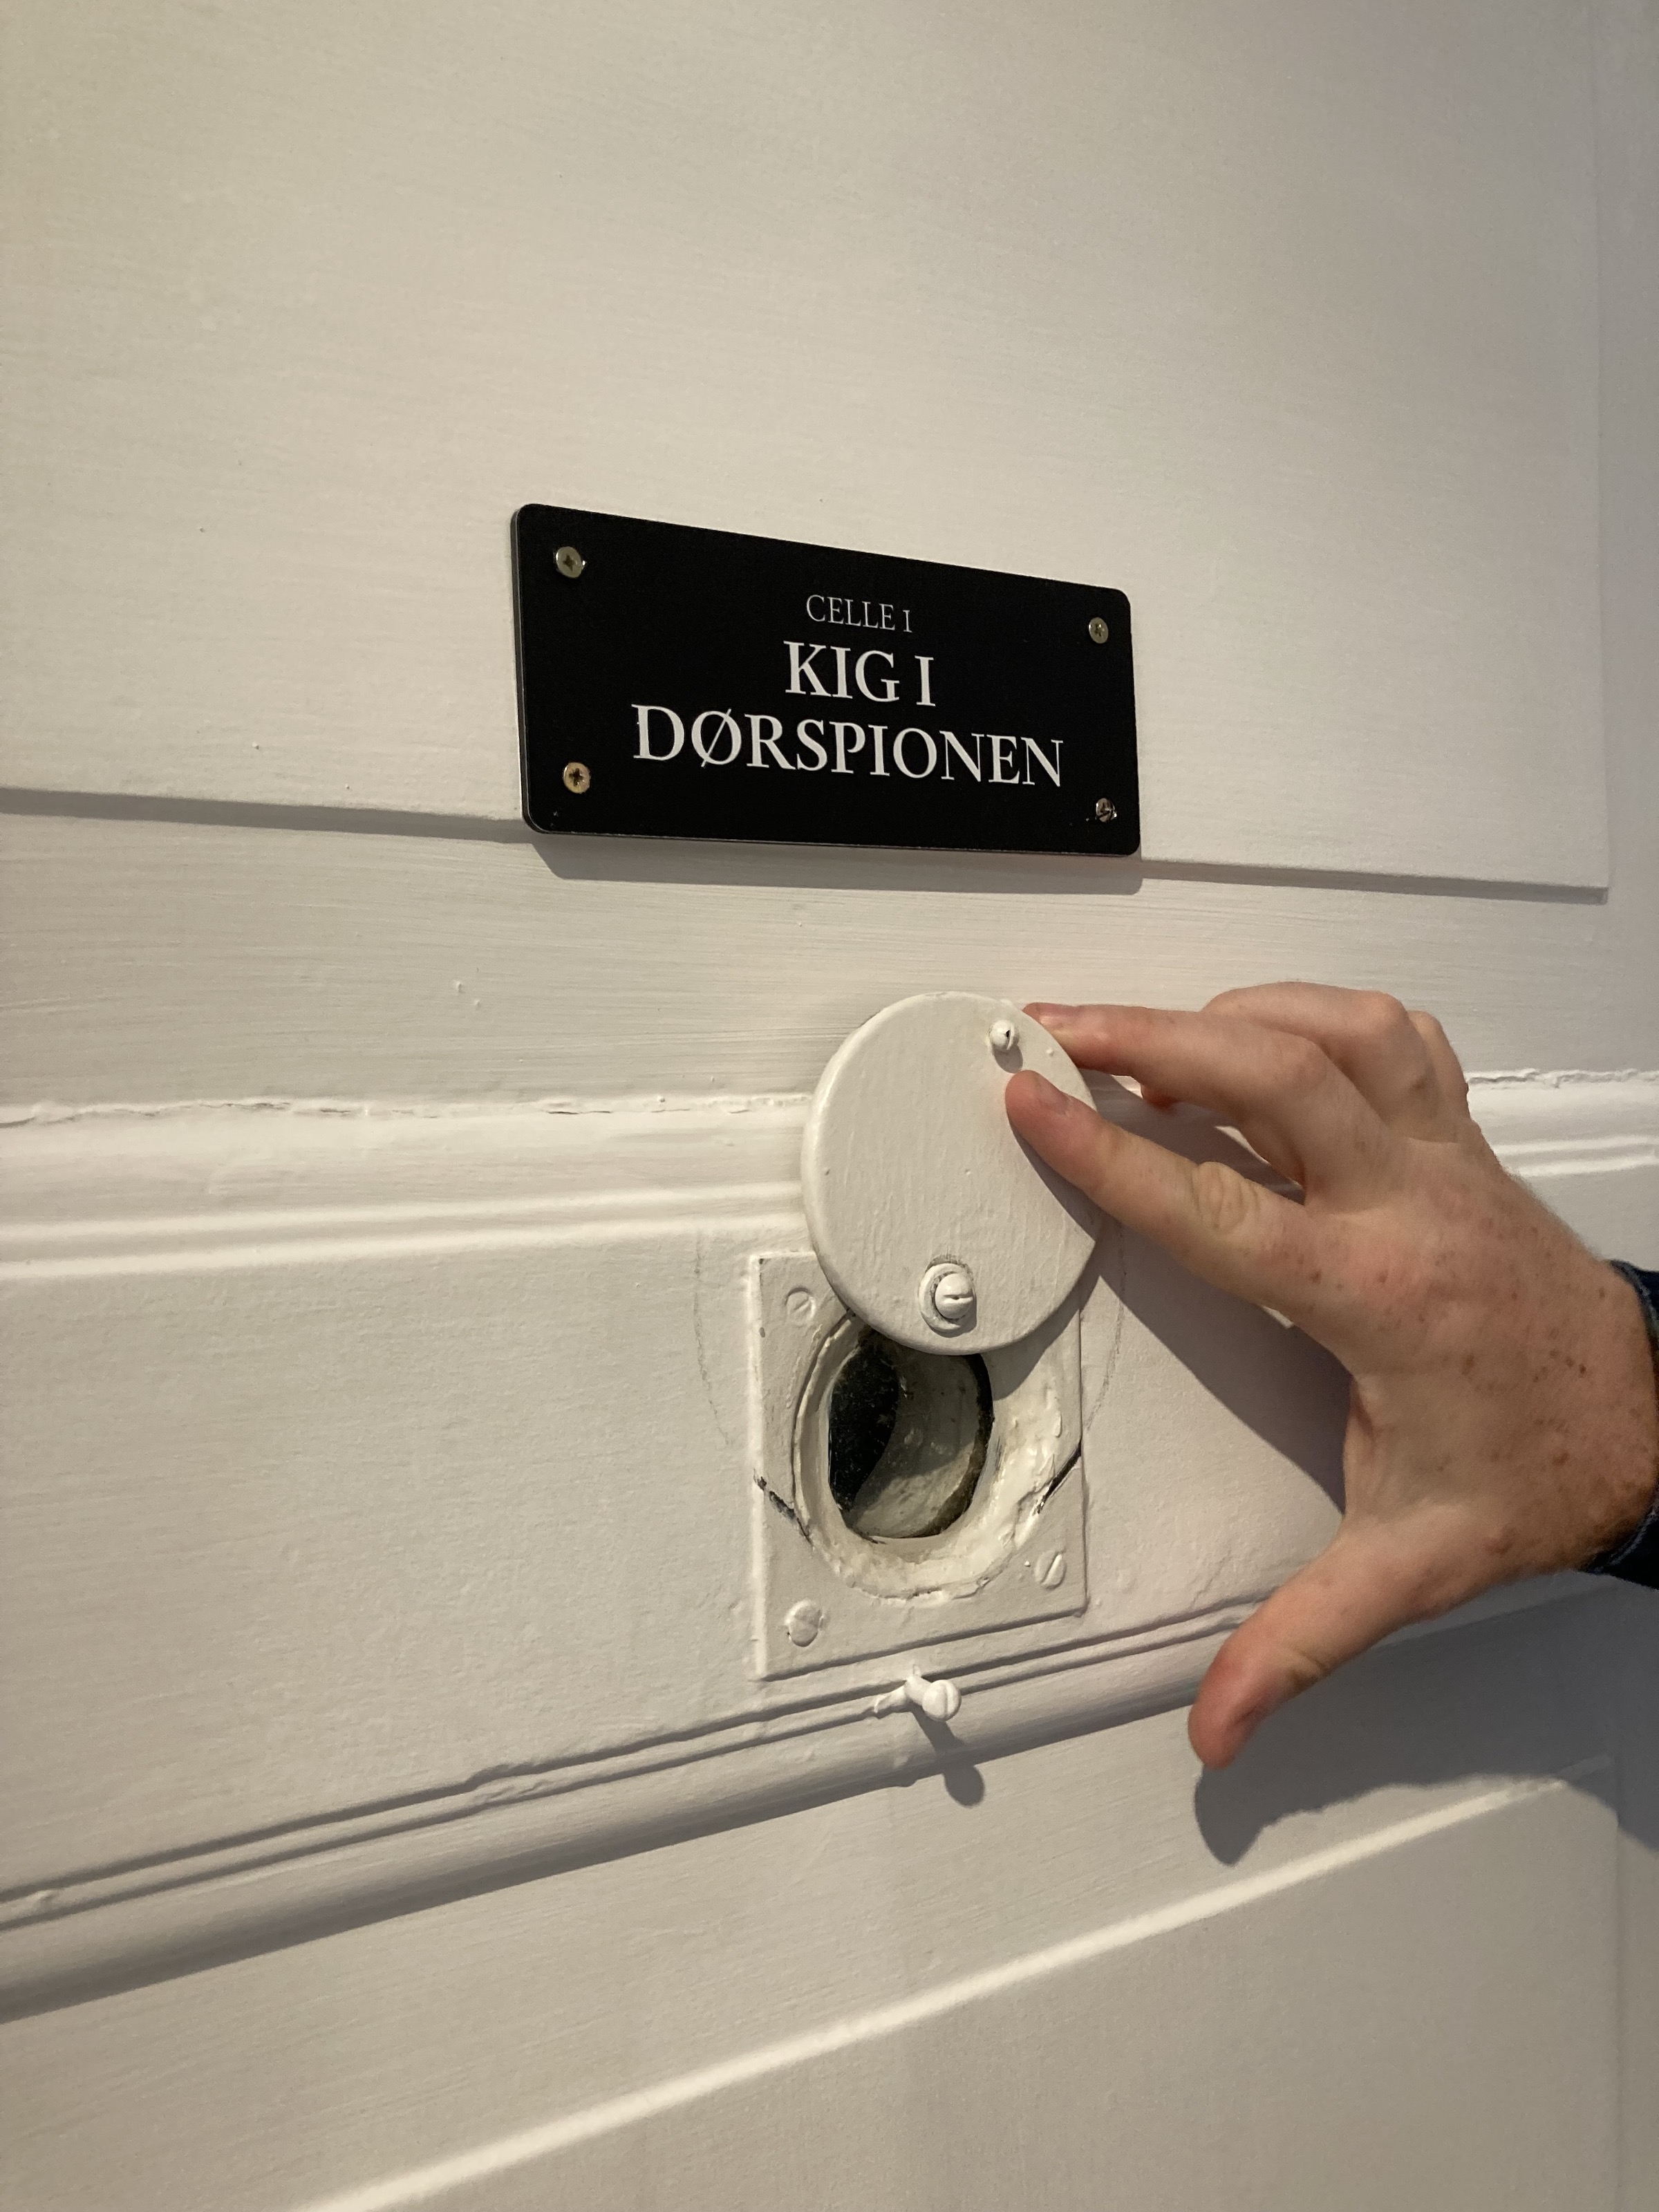
Photos from exhibition opening
Below you will find photos of the exhibition on the day of the opening of Historieporten.
Photos from the exhibition opening
Photo from the exhibition opening
Photos from the exhibition opening